


By: Salvaged By Sammie

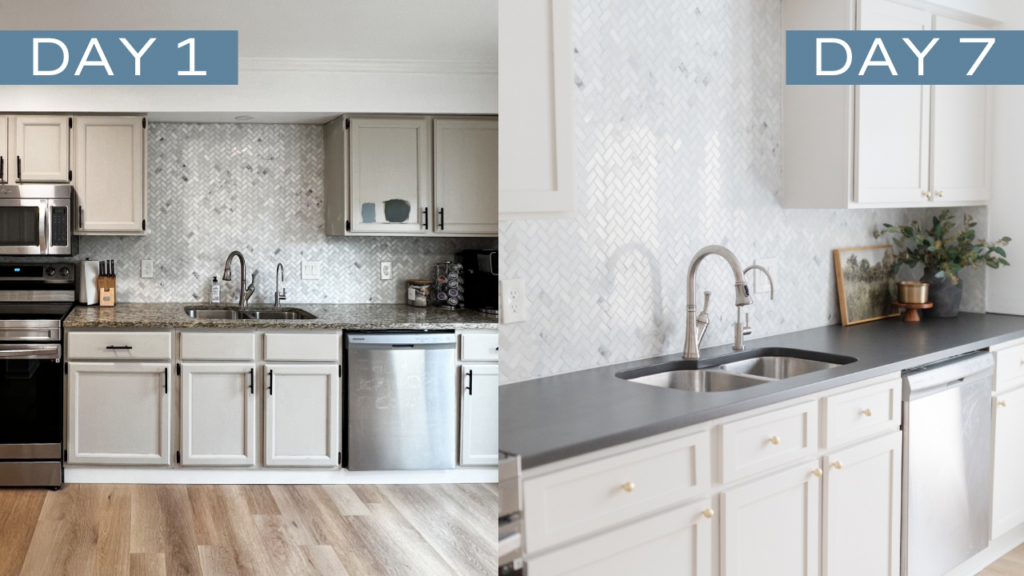
Buckle up, because I’m about to take you on a whirlwind journey through my epic budget-friendly kitchen makeover, that saved us over $15,000. You can find a full video of the makeover here. From swapping out cabinet doors and painting the countertops (yes, you read that right), to giving the fridge a fresh coat of paint – this is full of cost-effective tips and tricks for you to try!
I’m a DIYer who has slowly worked my way through our house with affordable DIY projects. And now, I’m going to teach YOU how to do it too.

For an affordable Kitchen makeover like this, you’ll need the following items:
This post contains affiliate links. See policies for details.
- Full Kitchen Product list – exact products I used!
- NuDoors & NuDoors DIY kit
- Countertop Painting Kit
- Cleaner / Degreaser
- Mini Rollers
- Paint Brushes
- Caulk
- Appliance Epoxy
- New Hardware – optional
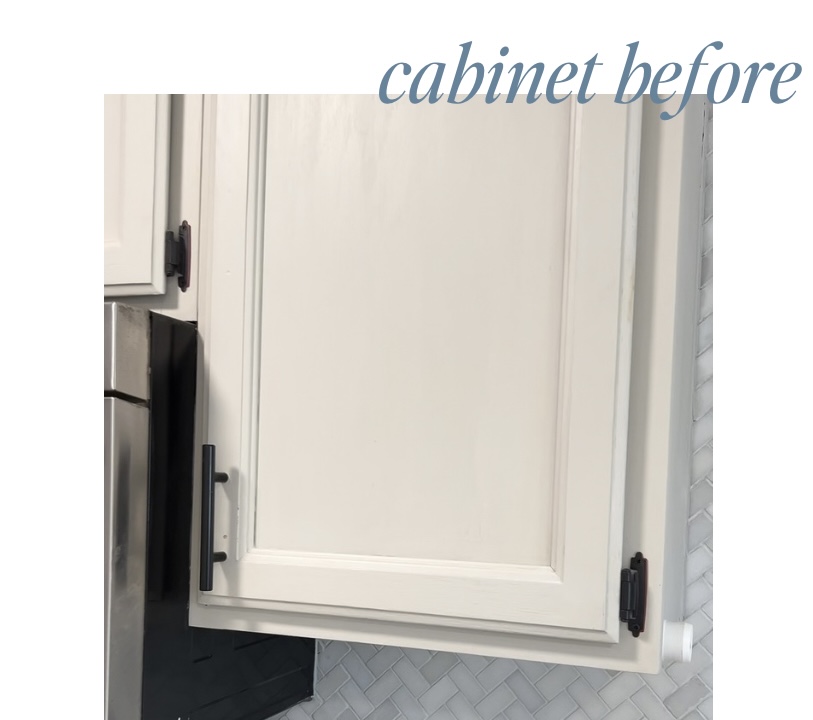
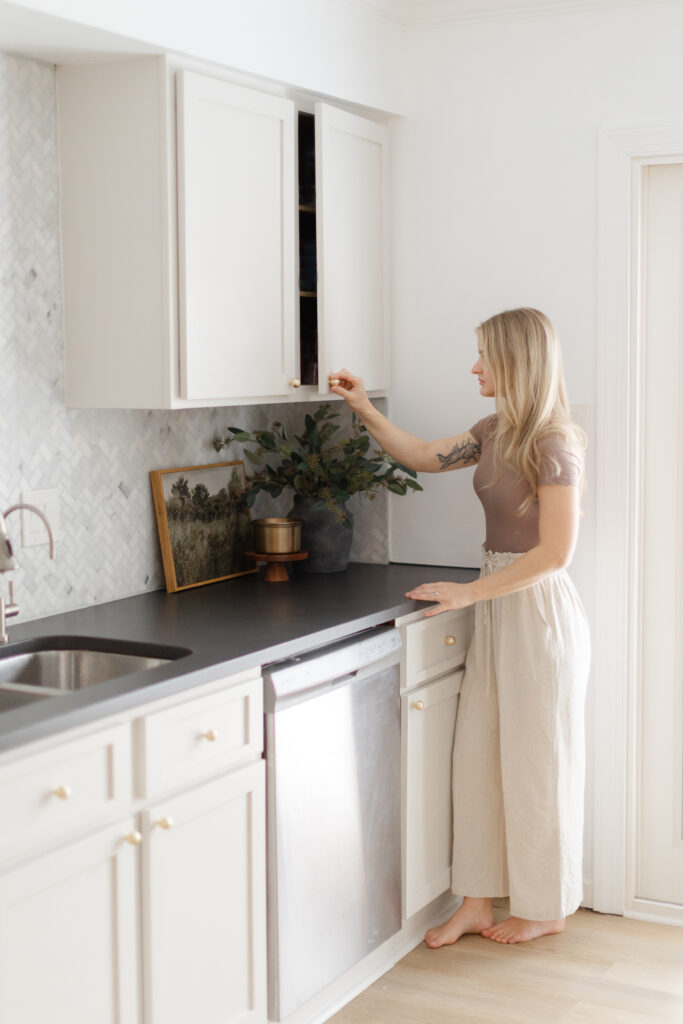
Step 1: Refreshing Your Kitchen Cabinets
After failing at painting these kitchen cabinets 3 years ago, it was time to replace and modernize them. However, demoing a kitchen by myself with a toddler and deployed husband was NOT going to happen!
Nudoors offers replacement cabinet door fronts so you can modernize your kitchen, without the demo. After ordering my doors & choosing a color, they sent a DIY kit for me to paint the cabinet frames (they include EVERYTHING YOU NEED in this kit for painting, how cool?!), and the doors were delivered right to my doorstep and ready for installation.
With my vision in mind, it was time to roll up my sleeves and get to work. I cleared out the kitchen, removed the cabinet faces, taped off surfaces, and prepped everything for the painting extravaganza that was about to unfold.
First, I cleaned them thoroughly with a degreaser, and then lightly sanded them to prep for the primer. Using mini paint rollers, I rolled on the primer, and finally 2 coats of the actual paint. We went with “Balboa Mist” by Benjamin Moore for the paint color.
Then, I installed all the doors with soft close hinges (provided in the NuDoors kit)…this is a game changer if you have kids, no more cringy sound of doors slamming shut!
Step 2: Updating Your Countertops
Next, it was onto painting the countertops – yes, you heard that right! I used a special countertop painting kit to give them a sleek finish.
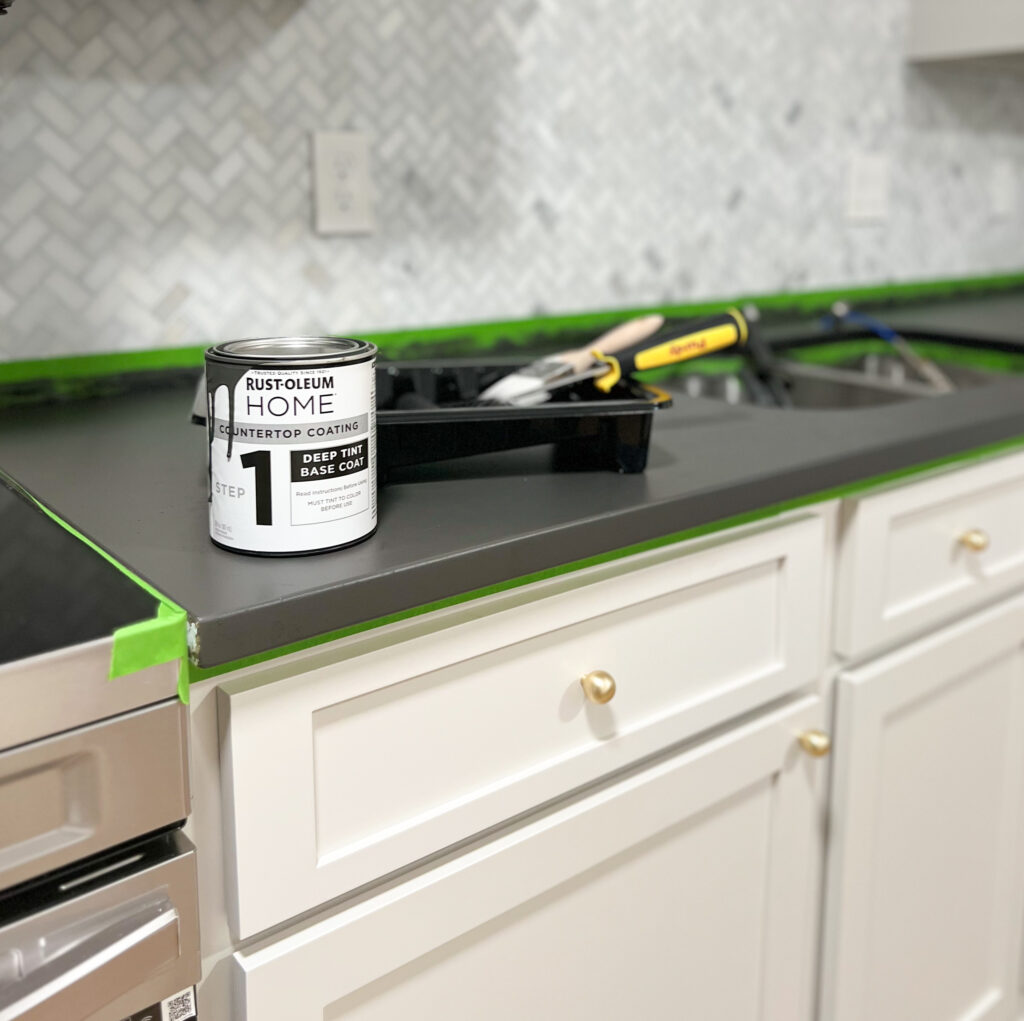
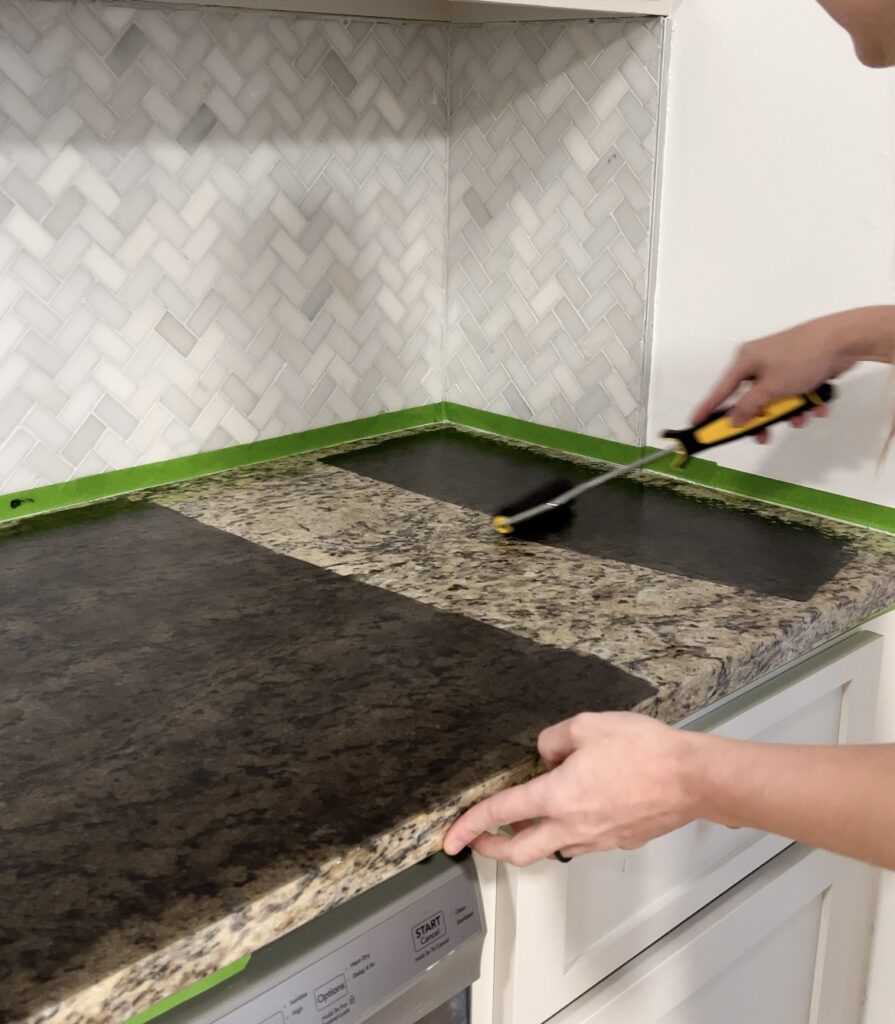
Our granite counters were outdated, and you could never tell when they were dirty, which drove me nuts! I used this 2 Part Countertop Kit (paint and topcoat) to completely transform my kitchen counters. I was super skeptical after the first coat, but the 2nd and 3rd sealed the deal for me, and I couldn’t be happier with how it turned out!
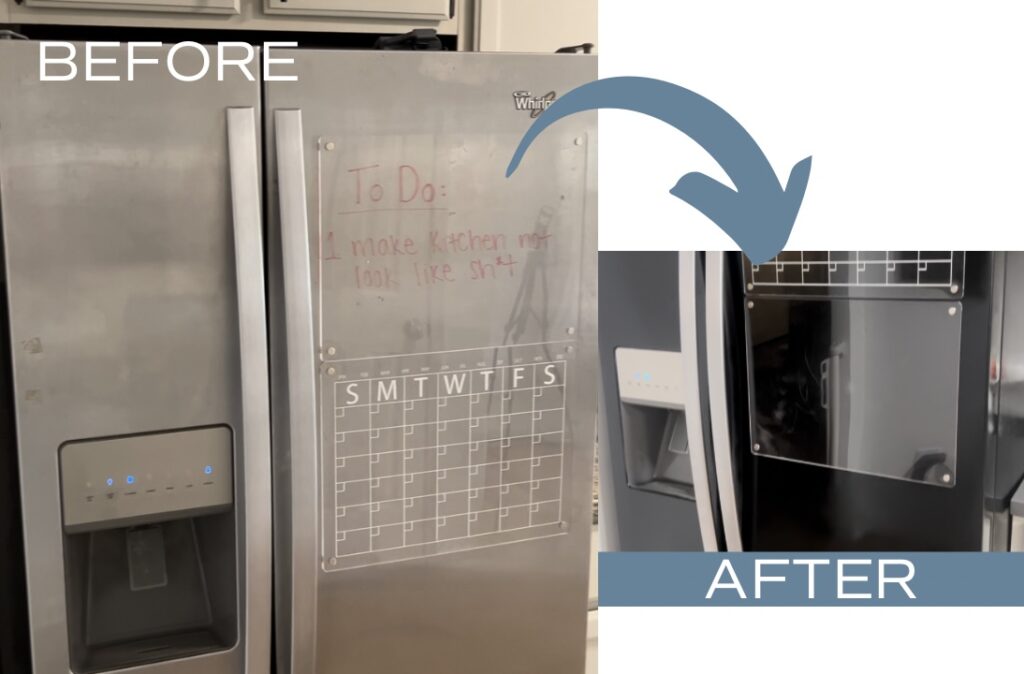
Step 3: Fixing up the Fridge
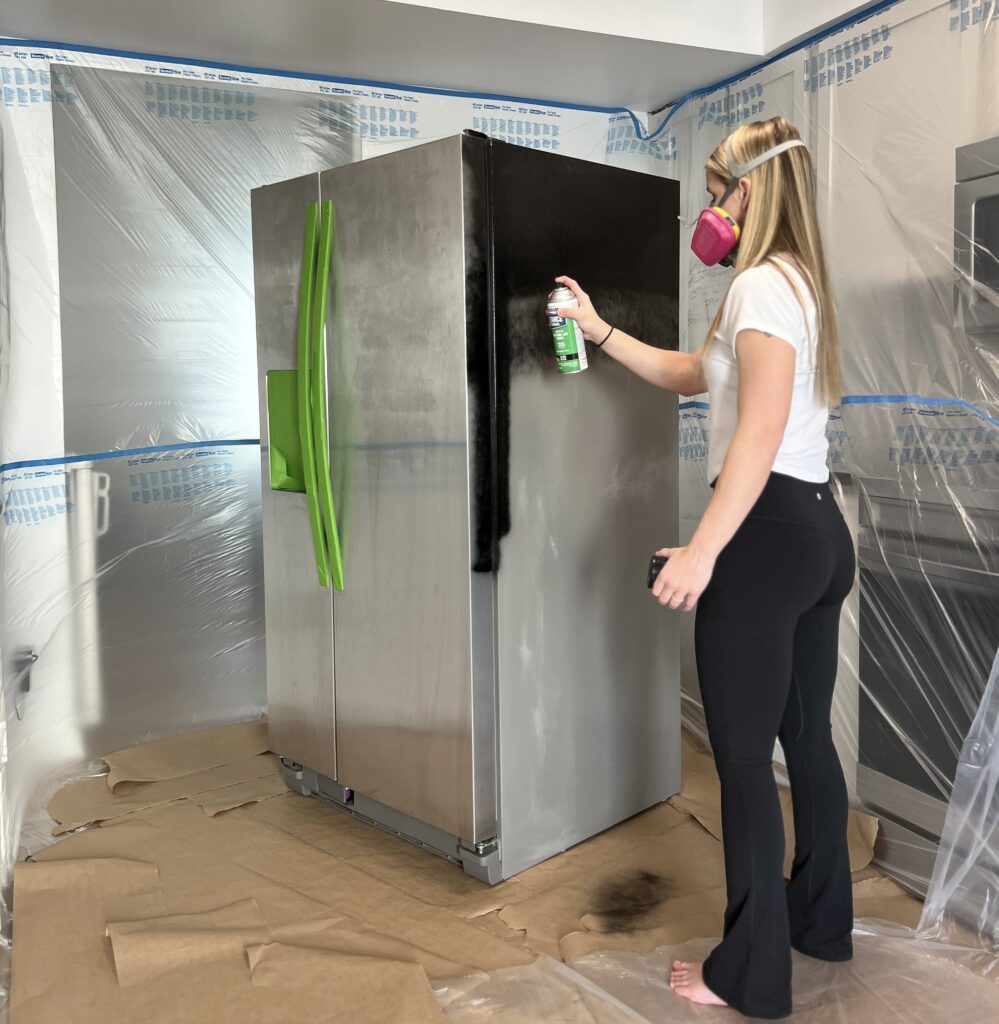
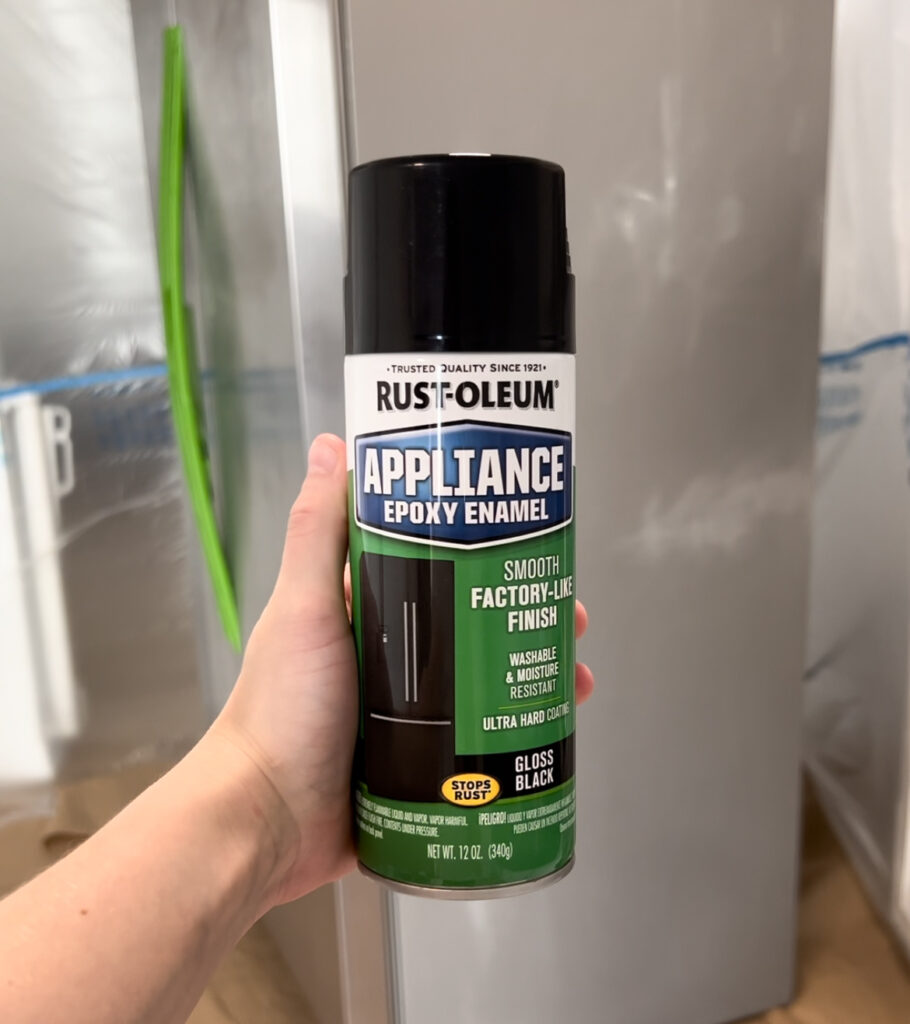
I couldn’t resist leaving the fridge untouched. I mean, everything was getting a facelift, right?! This refrigerator came with our house when we bought it but had lots of little rust spots and scratches. New appliances are expensive, so I opted for the appliance epoxy to give it a refresh while we save up for a new one.
It turned out WAY better than I expected and would be the perfect way to refresh even a thrifted fridge. Would you ever try this?
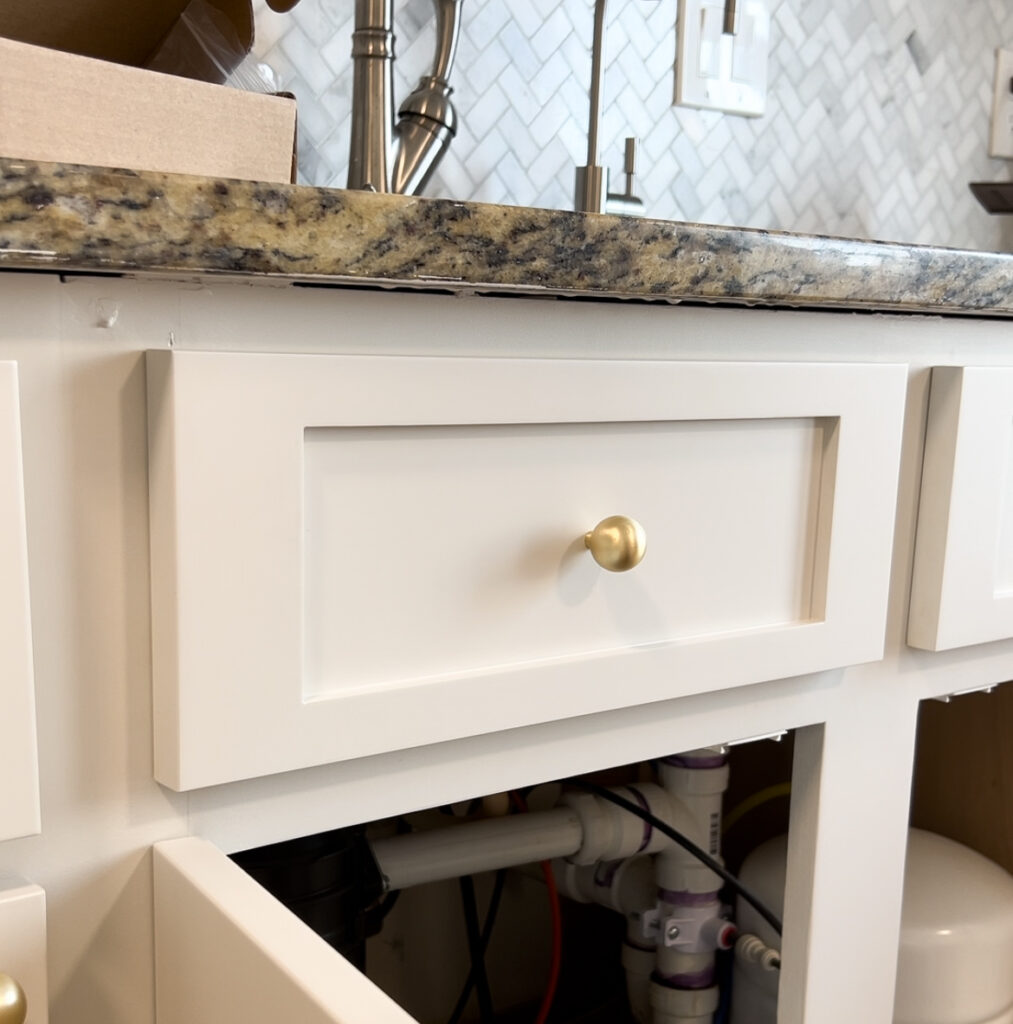
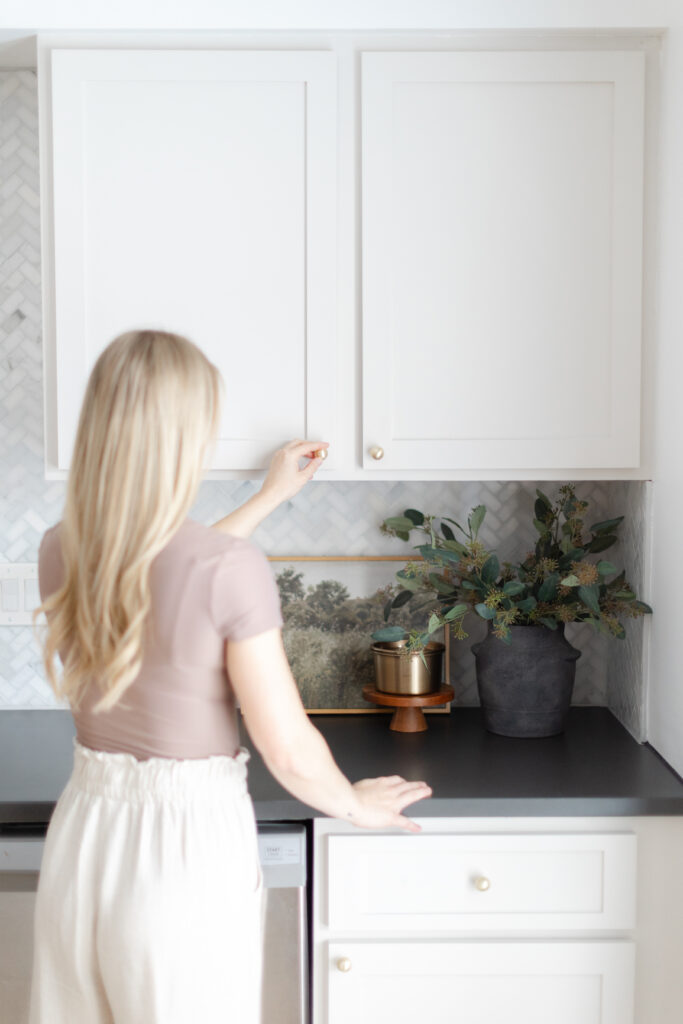
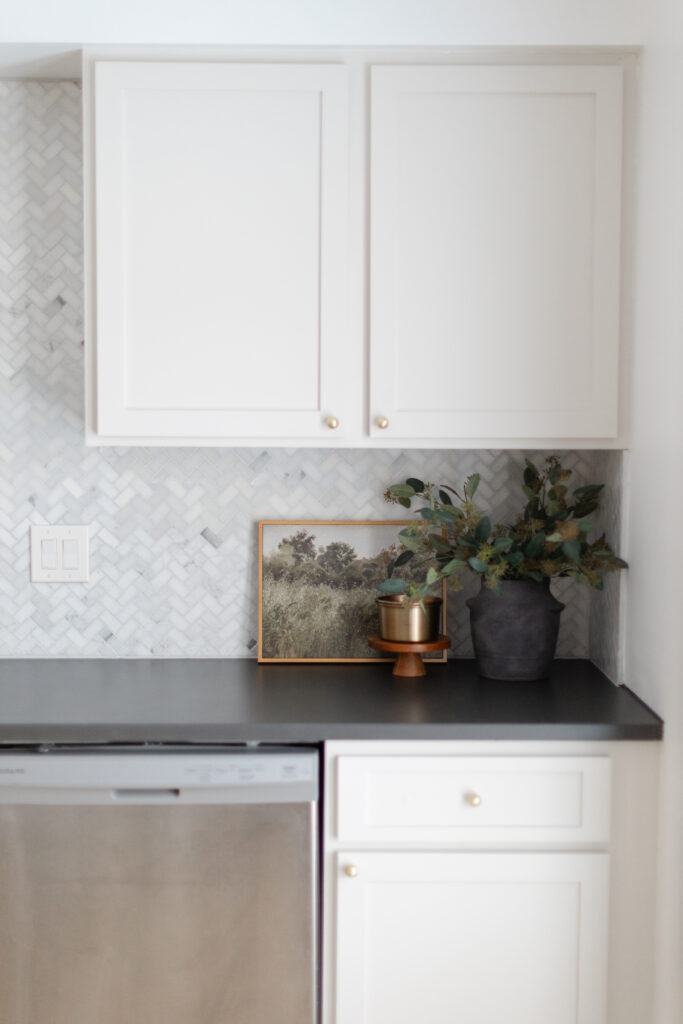
Step 4: Updating Kitchen Cabinet Hardware
With the painting complete, it was time to add those special touches that would elevate the space to the next level. I swapped out cabinet hardware, added some stylish new light fixtures, and brought in fresh greenery to breathe life into the room.
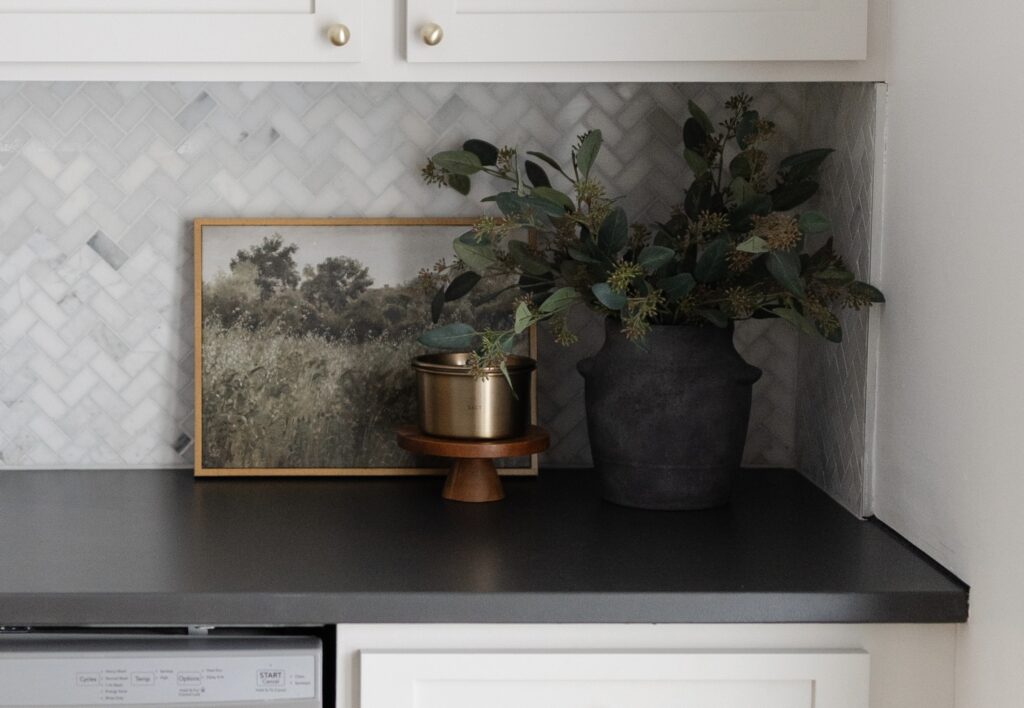
Step 5: Kitchen Countertop Styling and Staging
They say it’s all in the details, and I couldn’t agree more. I spent day six styling and staging the kitchen, arranging knick-knacks, and strategically placing decor to create a cohesive and inviting space. My style is less in more when it comes to the counters in the kitchen, because we want this budget-friendly kitchen makeover to be the focus.
The Final Reveal
And finally, the moment we’ve all been waiting for – the big reveal! Drumroll, please… Ta-da! My kitchen makeover is complete, and let me tell you, it’s nothing short of a masterpiece. I’m still in awe that this kitchen makeover happened in just 5 easy steps. From drab and outdated to fresh and fabulous, this transformation has exceeded even my wildest expectations.
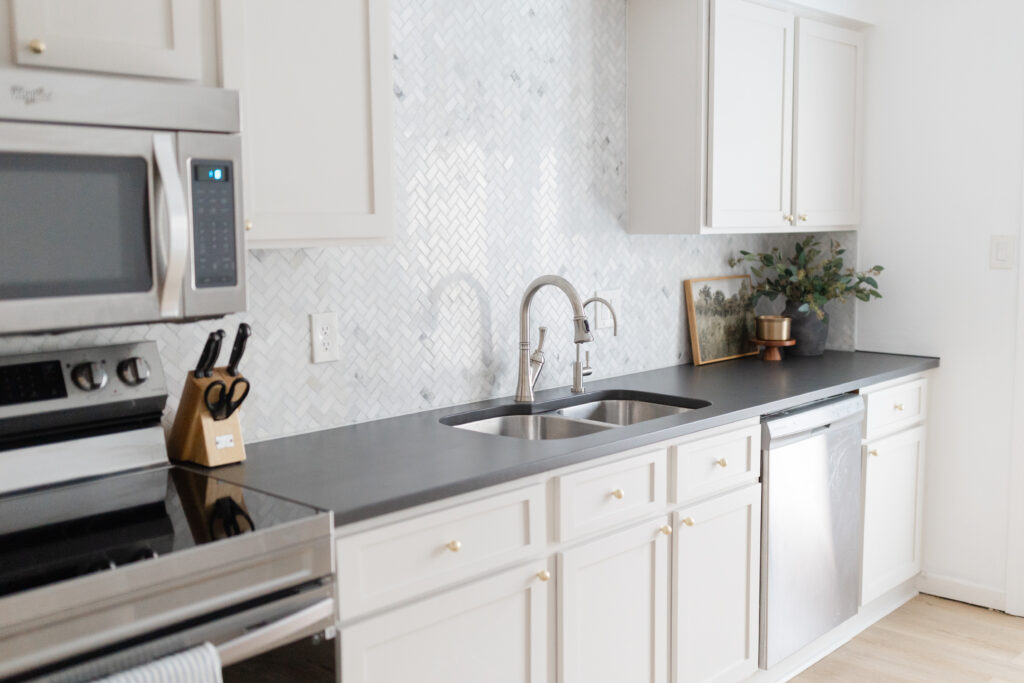
Let me tell you, the end result was nothing short of amazing (even I didn’t think it would turn out this well!)
Now, here’s the best part: YOU CAN DO THIS TOO! I’ve put together a list of all the products you’ll need to get started on your budget-friendly project: Kitchen Makeover list. So, if you’re feeling inspired to tackle a similar project yourself, you’ll have everything you need right at your fingertips. Not up for a kitchen makeover but want to start another DIY? You can shop all my favorite DIY products HERE.
There you have it, folks – proof that you can transform any space into the kitchen of your dreams, in just five steps. Cheers to DIY magic and the power of a fresh coat of paint! Who knew that you could truly transform your kitchen in just 7 days! Can’t wait to hear what you think in the comments below!
See you soon,
Sammie


