

BY: SALVAGED BY SAMMIE | JUNE 1, 2024
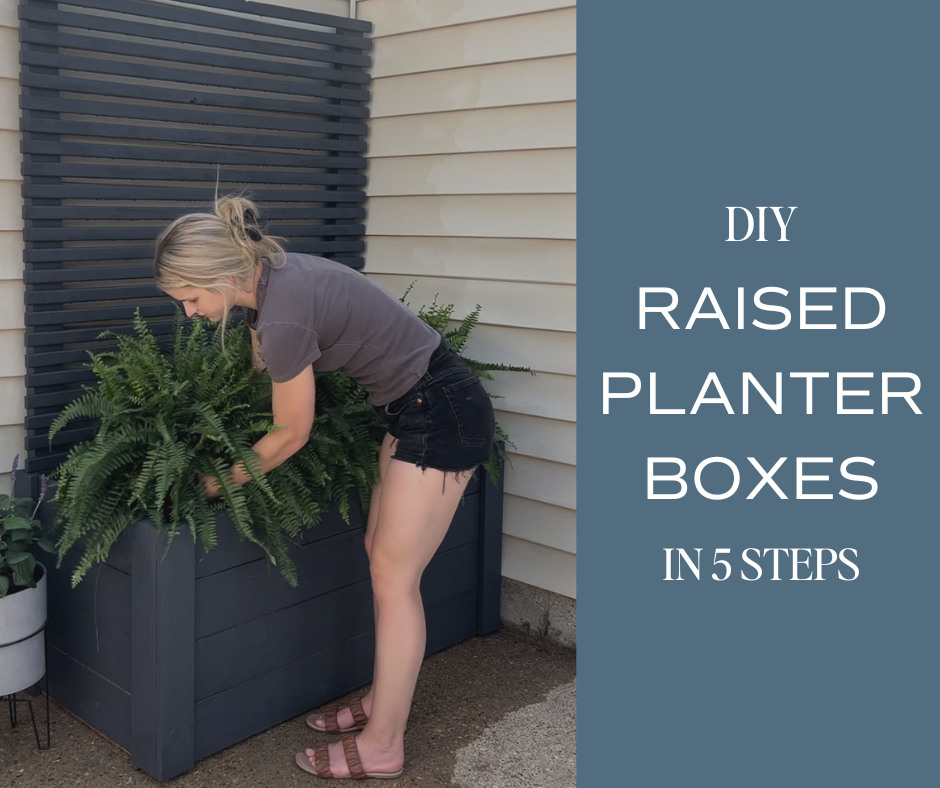
How to Build DIY Planter Boxes in just 5 Steps
Let me share with you one of my favorite hacks for your outdoor space. This 5-step DIY planter box is one you’ll want to save! My favorite part of this project and what makes it so good, is that anyone can do it. Whether you’re living in a home, renting, or even have a small apartment balcony; this planter box will give life to a bare outdoor space. All you need are some pressure-treated boards, stain, and a little bit of time. Trust me, if I can do it, you can too! It’s the perfect weekend project to elevate your outdoor living space and add a touch of greenery to your home. Let’s dive into the details!
Whether you’re an avid DIYer, or just starting out, YOU can do this project! And trust me, your guests will be in awe when they see how big of a transformation it makes to your space!
Latest Projects:
- DIY Raised Planter Box (Just 5 Steps!)
- IKEA Flip: A Pottery Barn Inspired Makeover
- 5 Steps to Transform Your Kitchen on a Budget
- Thrift Store Find to Designer Look: A $100 Dresser Makeover
To build your own planter box, you’ll need the following items:
This post contains affiliate links. See policies for details.
Materials:
- Full Product List – exact products I used
- Cabot Outdoor Stain
- Mini Rollers
- Paint Brushes
- (2) 2x4x6’ Pressure Treated Boards
- (24) 1x2x6’ Pressure Treated Boards
- (8) 1x6x4’ Fence Boards
- 2 1/2″ Deck Screws
Tools:
- Miter Saw (or hand saw)
- Drill
Step 1: Measure Your Space & Prep Materials
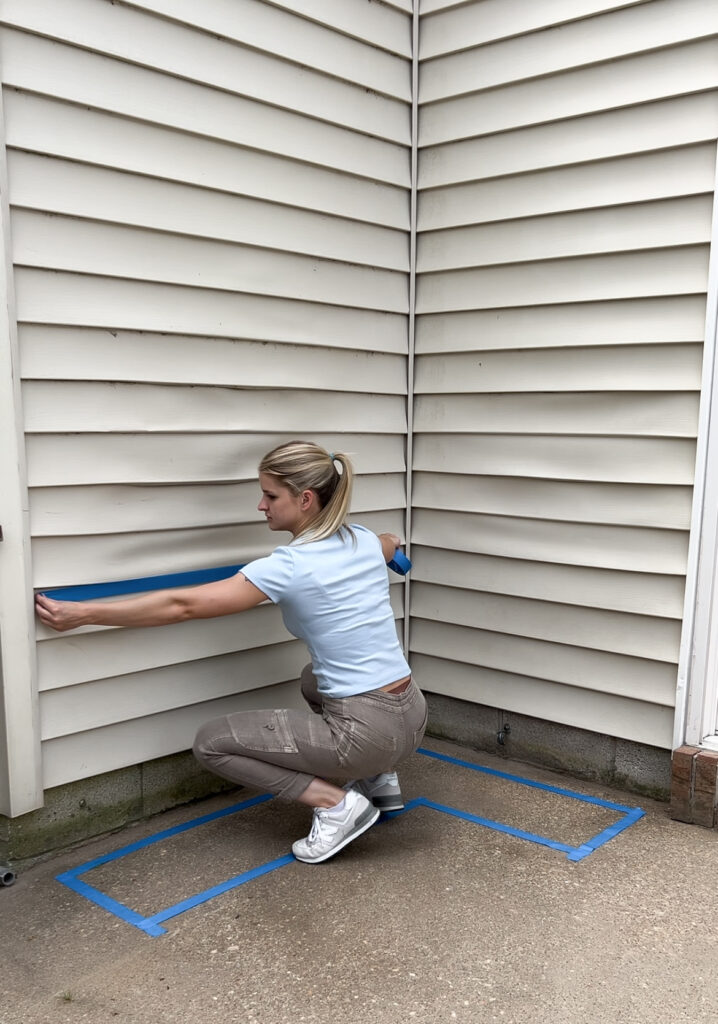
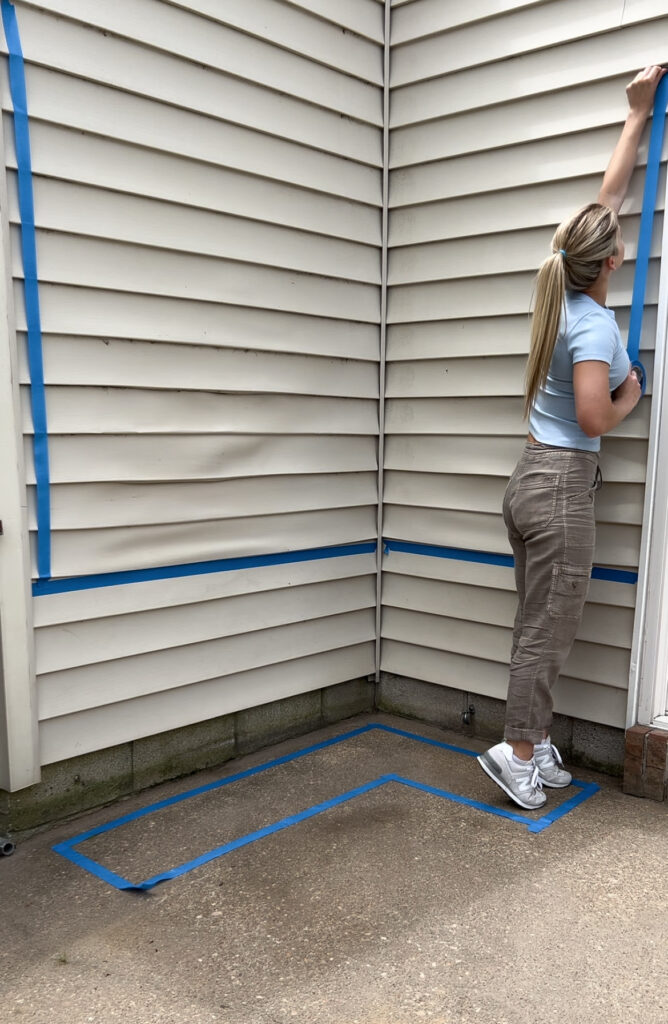
Before you dive into building your planter box, the first step is to measure your space and prep your materials. A little backstory on how this project came to be: my husband put our grill next to the house 2 years ago and warped the siding. So this year, I decided to hide it with this planter box. Because I wanted to make sure all the warped siding was hidden, I taped off the area where I wanted to place the planter box. And if this changes as you build, that’s okay! This is just meant to give you a rough estimate and plan. Next, grab your measuring tape and carefully measure the dimensions of your space. These measurements will guide you in cutting your boards to the appropriate lengths.
Once you have your measurements, it’s time to prep your materials. A clean workspace is essential for safety and efficiency, so take a few minutes to tidy up your area. Lay out all your tools and materials, such as the pressure-treated boards, screws, a saw, drill, and measuring tape. Having everything organized and within reach will save you from having to stop in the middle of your project to find a missing tool. This prep not only streamlines your process but also ensures a smoother, more enjoyable building experience. Now you’re ready to start cutting!
Step 2: Make Your Cuts
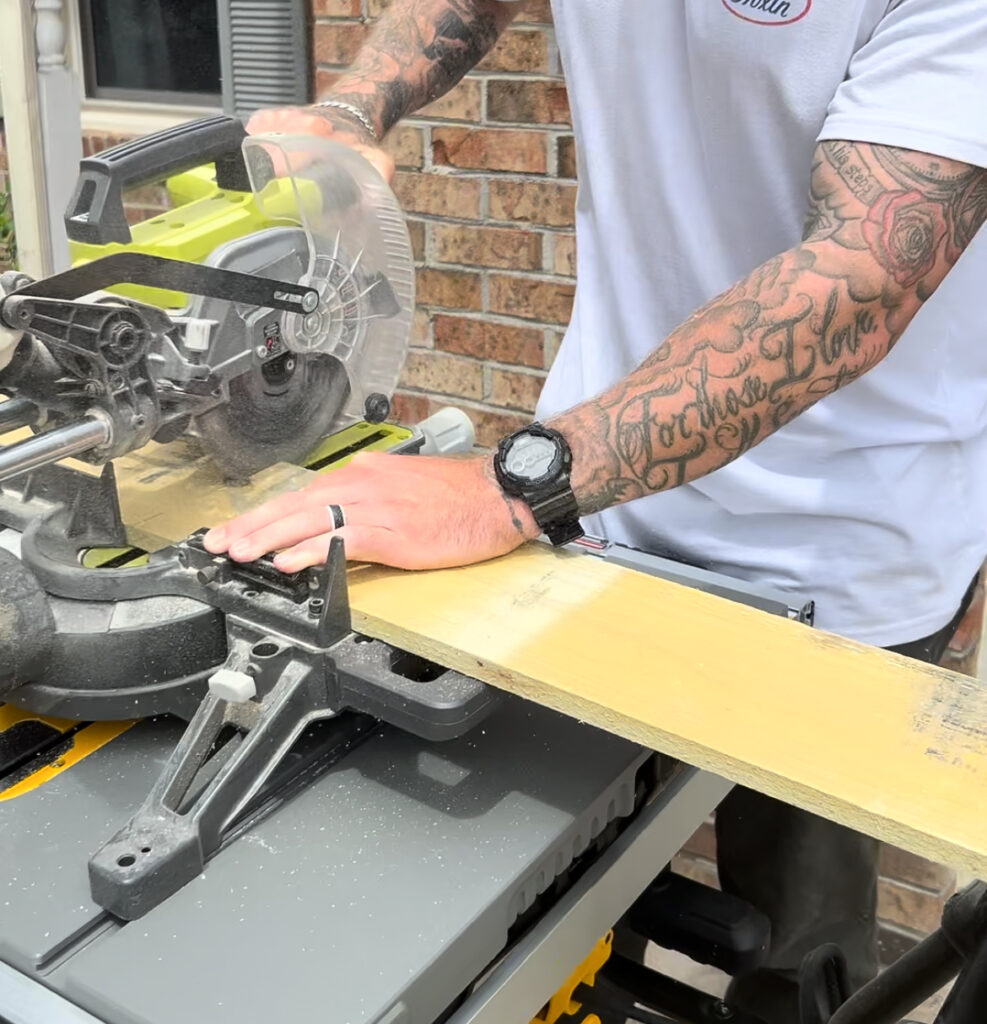
Start by marking the measurements on your boards with a pencil, ensuring each cut is precise. Measure twice to avoid any mistakes that could waste your materials. For this part of the project, we used a miter saw, which is perfect for making clean, straight cuts quickly and efficiently.
To save on costs, we used fencing boards for the sides of the planter box. Because our box was narrow, we were able to use one board to cut both a front and side panel. But, if you are making a larger planter box, this may not be the case.
Step 3: Assemble Your Planter Box
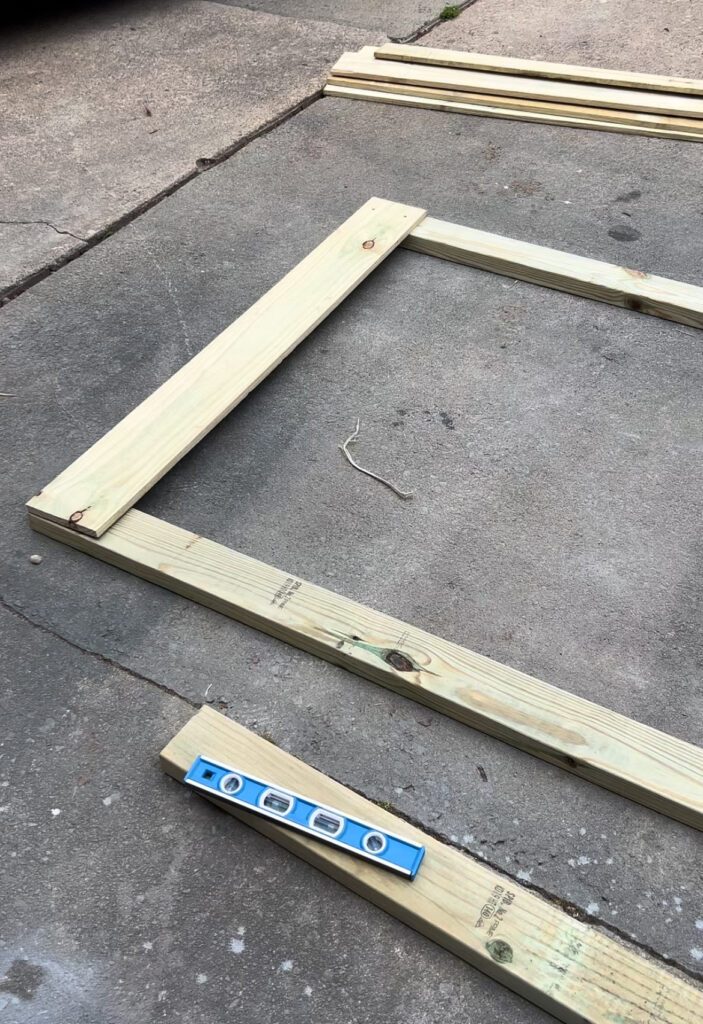
With all your cuts made, it’s time to bring your planter box to life. Start by laying out your cut boards according to your design plan. This will help you visualize how everything fits together before you begin securing the pieces.
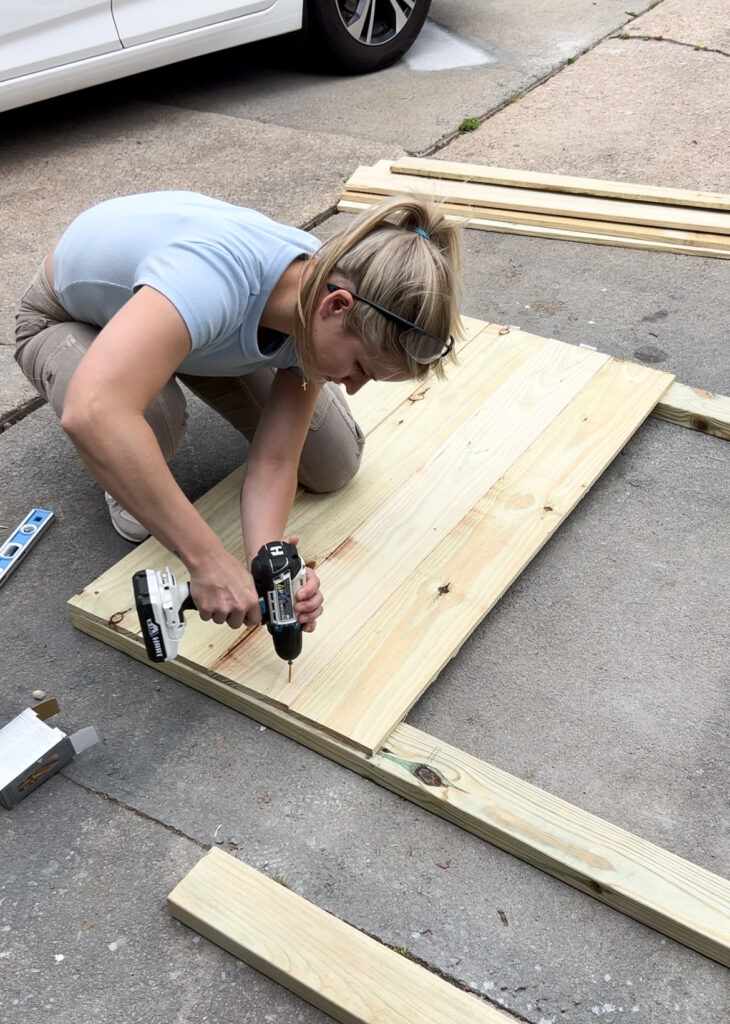
I used my drill for this part of the project, but you could use a screwdriver if you don’t have one. I started by assembling the base of the planter (laying down 2 2x4s and screwing the longer fence boards into it. This will be the back of the planter box when looking at it head on). I aligned the boards and secured them with screws, ensuring they are flush and square. This step is crucial for the stability of your planter, so take your time to get it right.
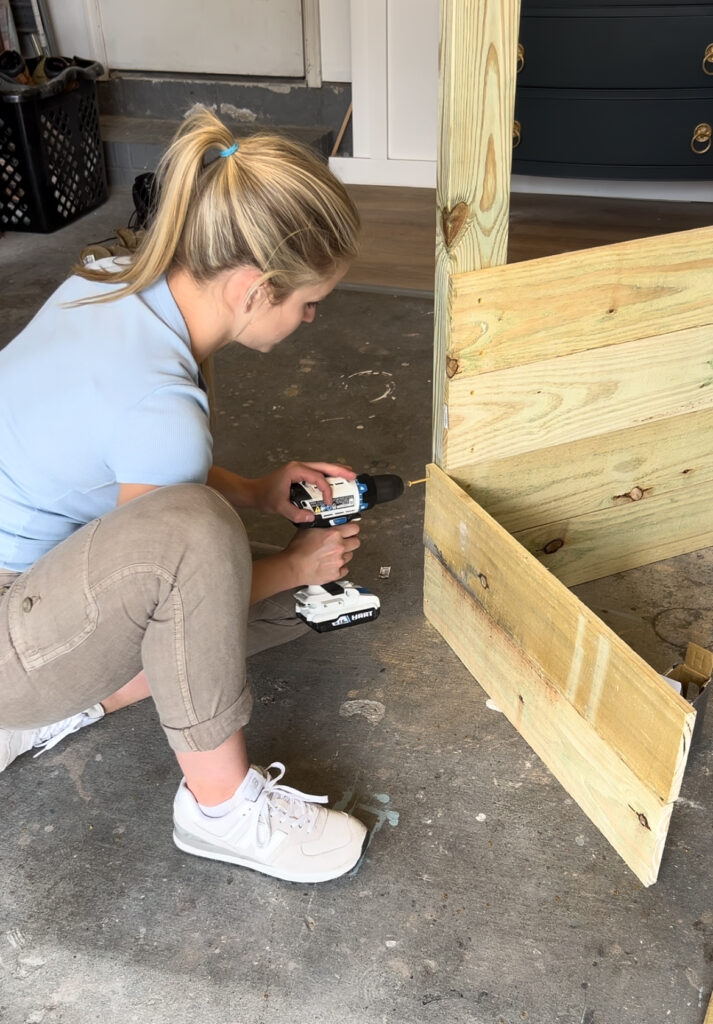
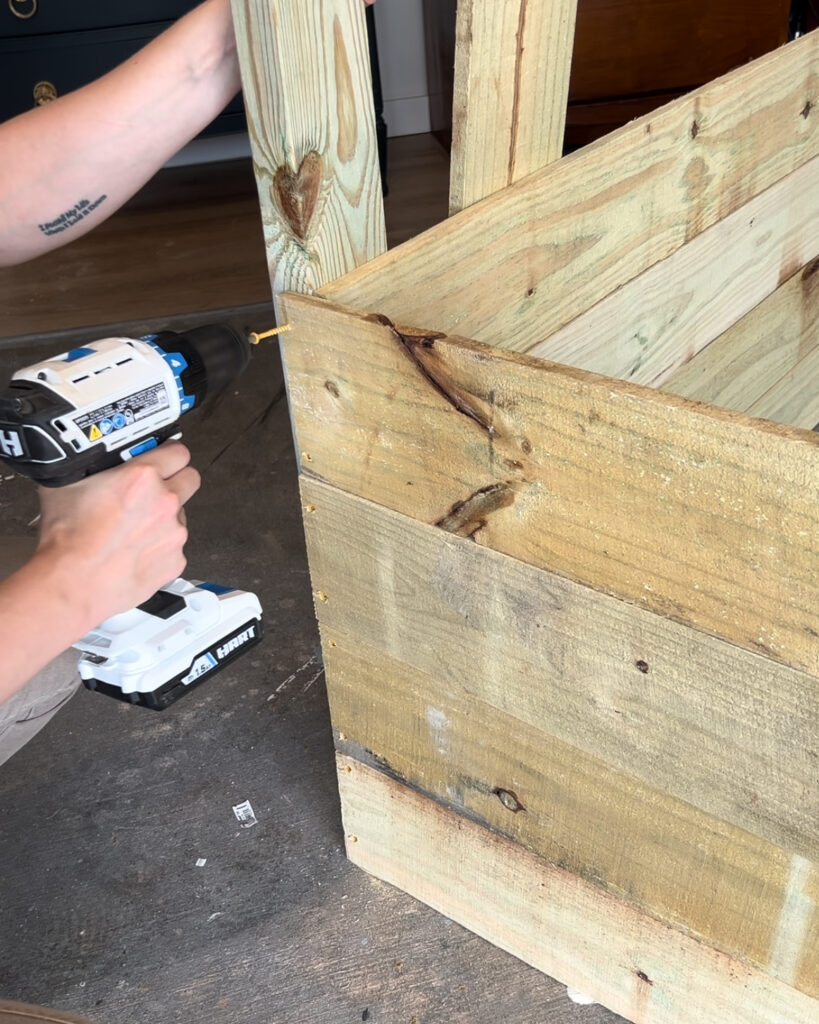
Next, move on to the sides of the planter. Attach the side boards to the base, one at a time, checking that each piece is level as you go. Having a second person to hold the boards in place while you drill can be incredibly helpful, especially if the boards are long or heavy. My husband was a great help here, making sure everything was steady and aligned.
Continue attaching the remaining sides, ensuring all corners are secured tightly. Once all sides are in place, reinforce the joints with additional screws if necessary. This will add extra strength to your planter box, ensuring it can hold up well over time.
Finally, give your planter a quick inspection. Check for any loose screws or uneven edges and make adjustments as needed. Now that your planter box is fully assembled, you’re ready to move on to the finishing touches. Let’s get it prepped for staining!
Step 4: Staining Your Planter Box
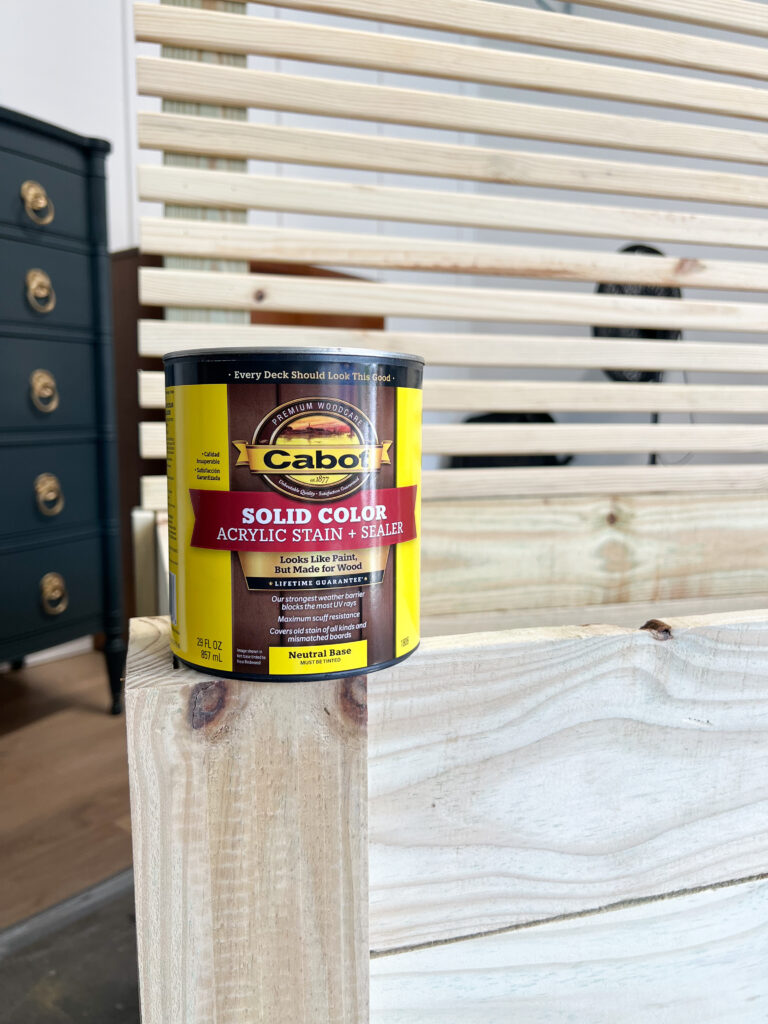
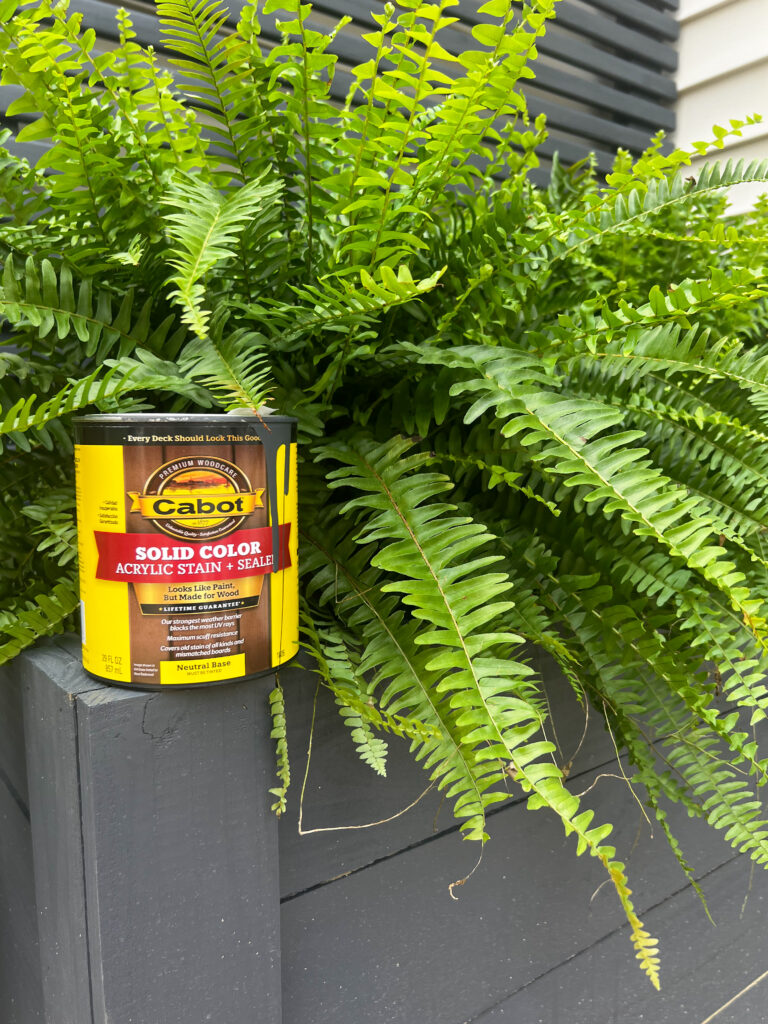
Now that your planter box is assembled, it’s time to give it a beautiful and durable finish with a stain. For this project, I chose Cabot Stain, and I couldn’t be happier with the results. Cabot Stain is renowned for its durability, making it the best choice for outdoor projects. This all-in-one product includes primer, stain, and sealant, ensuring your planter box is well-protected against the elements.
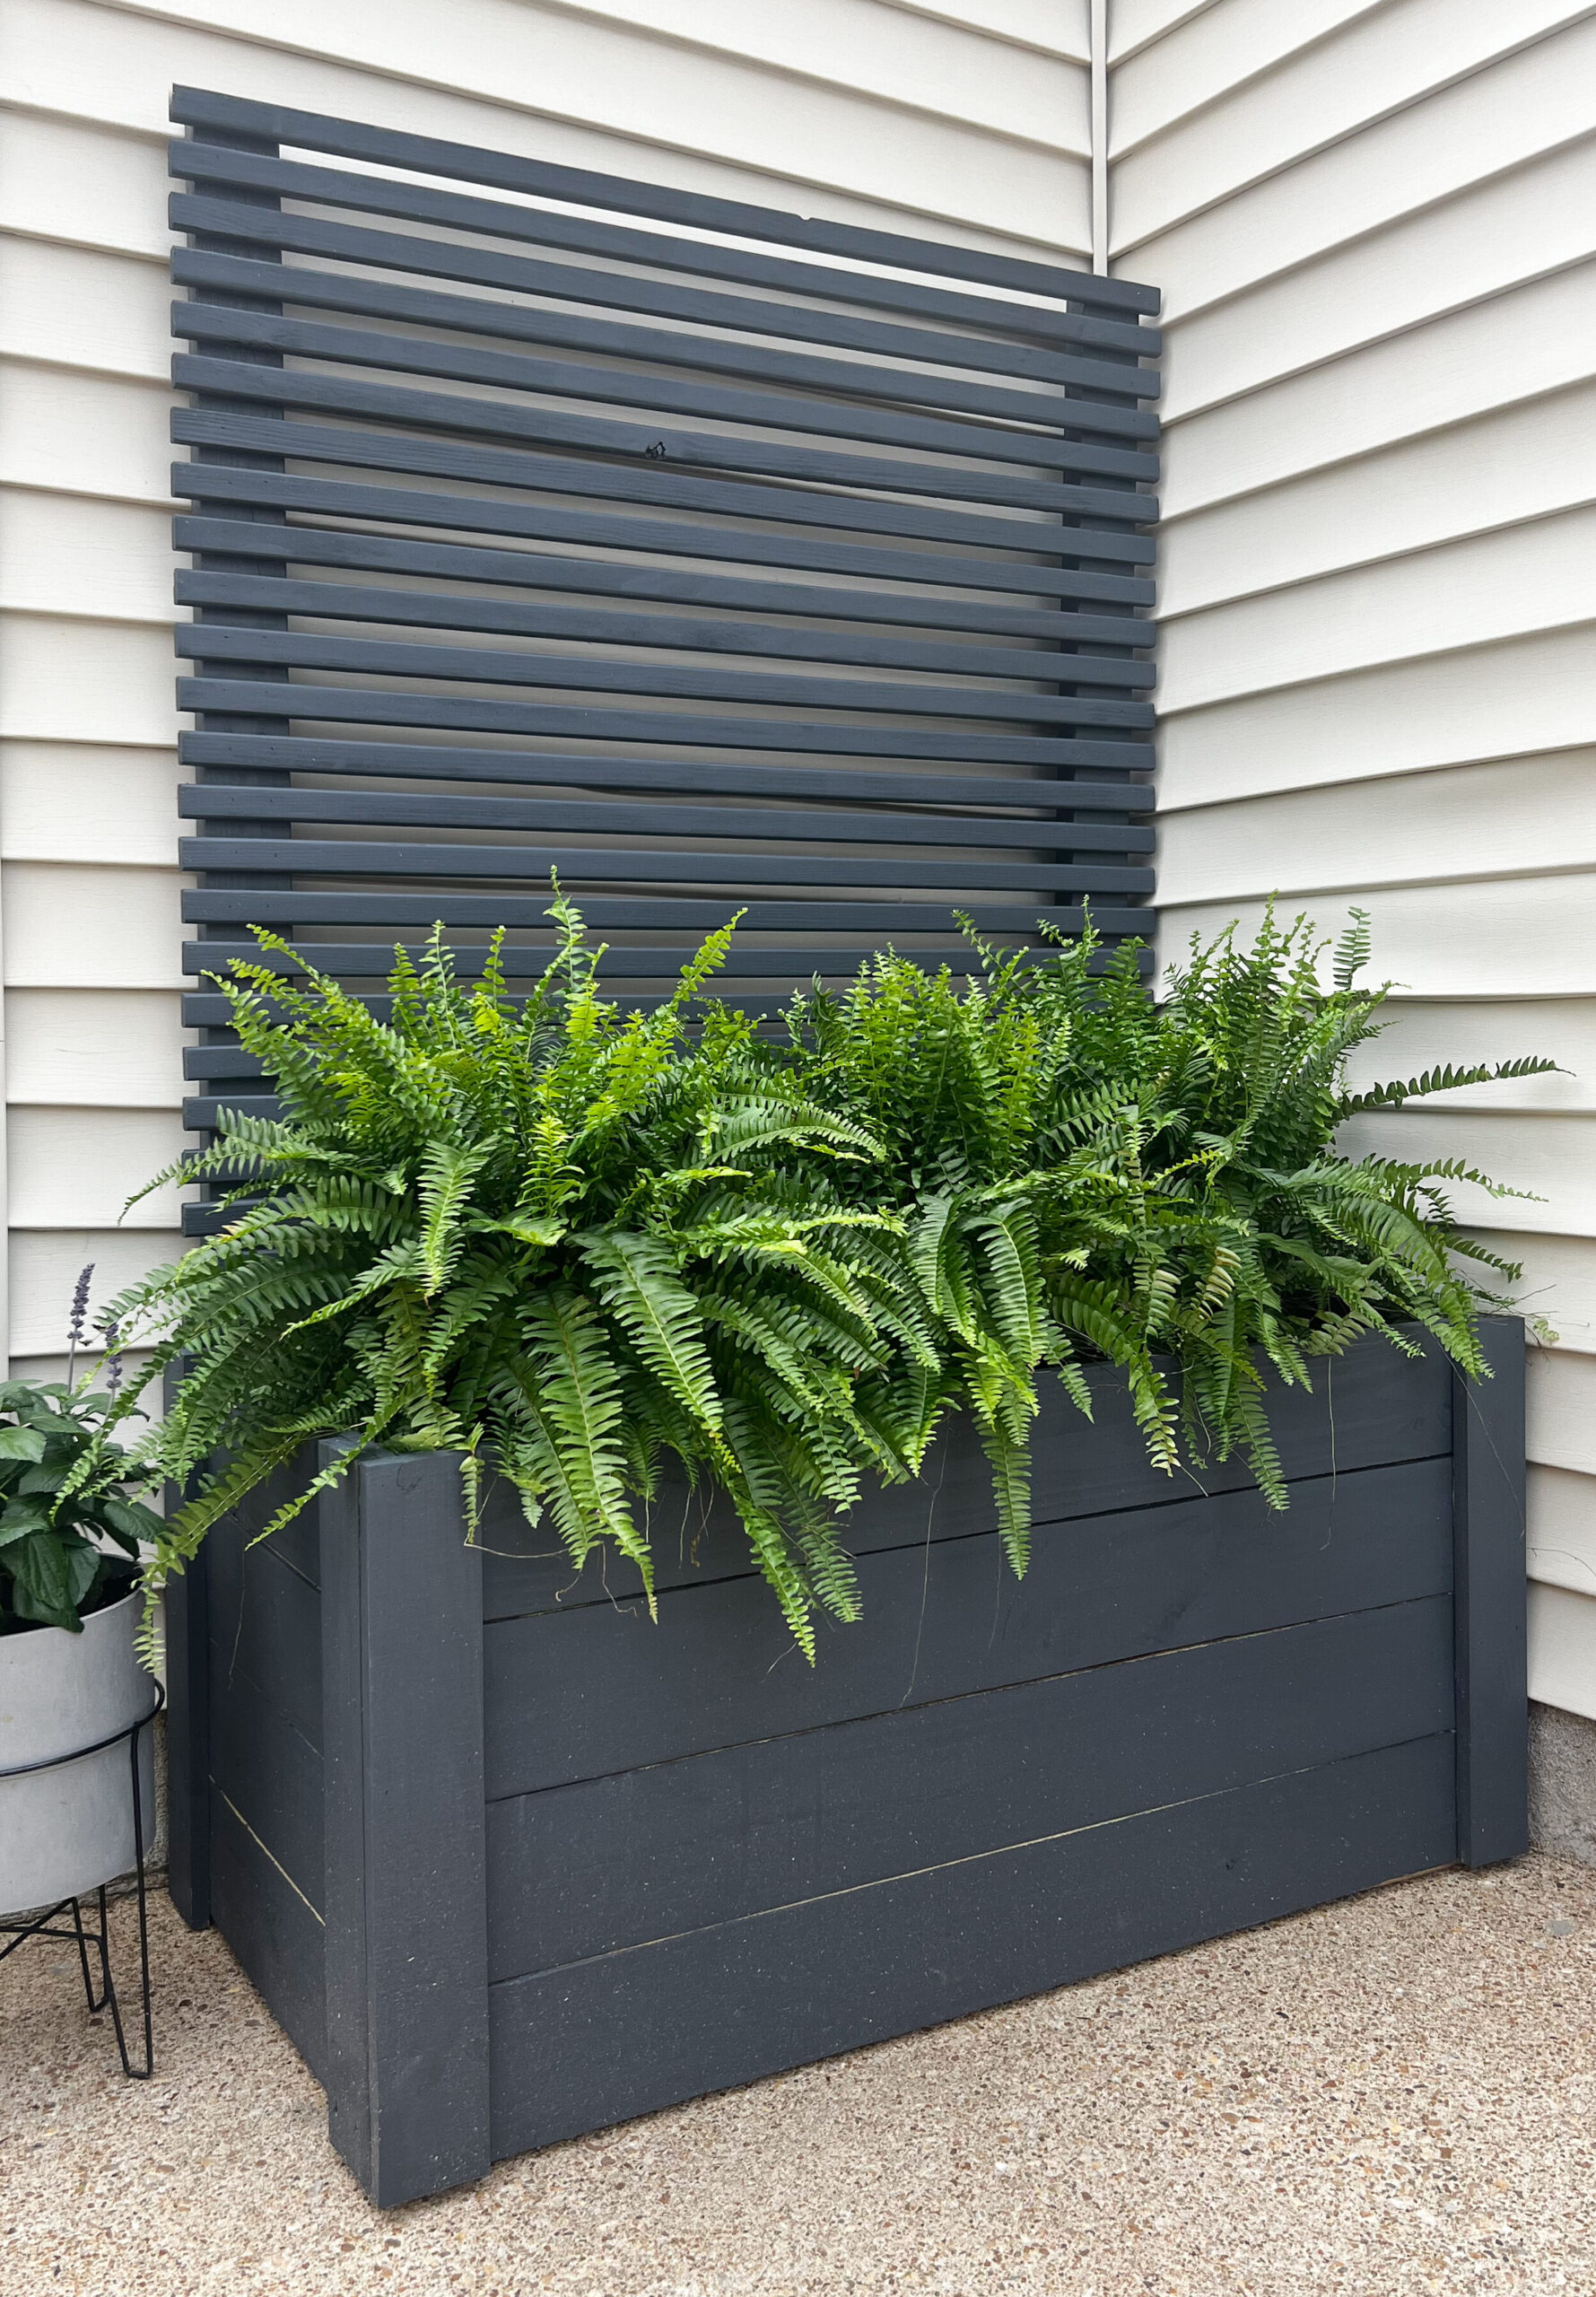
Another great thing about Cabot Stain is its versatility. It comes in a variety of sheens and colors, allowing you to customize the look of your project. Whether you prefer a transparent stain, semi-transparent, or solid stain, they’ve got it all. For this planter box, I went with their solid stain in the color “Dark Slate”. I’m so excited about how it contrasted our house but complimented the greenery we’ll be adding!
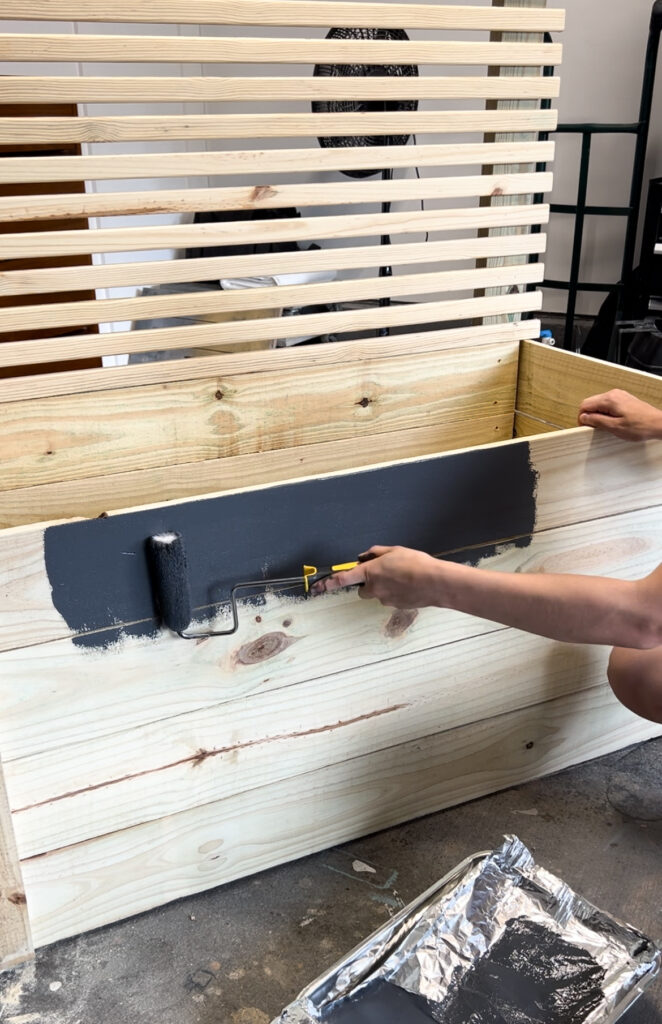
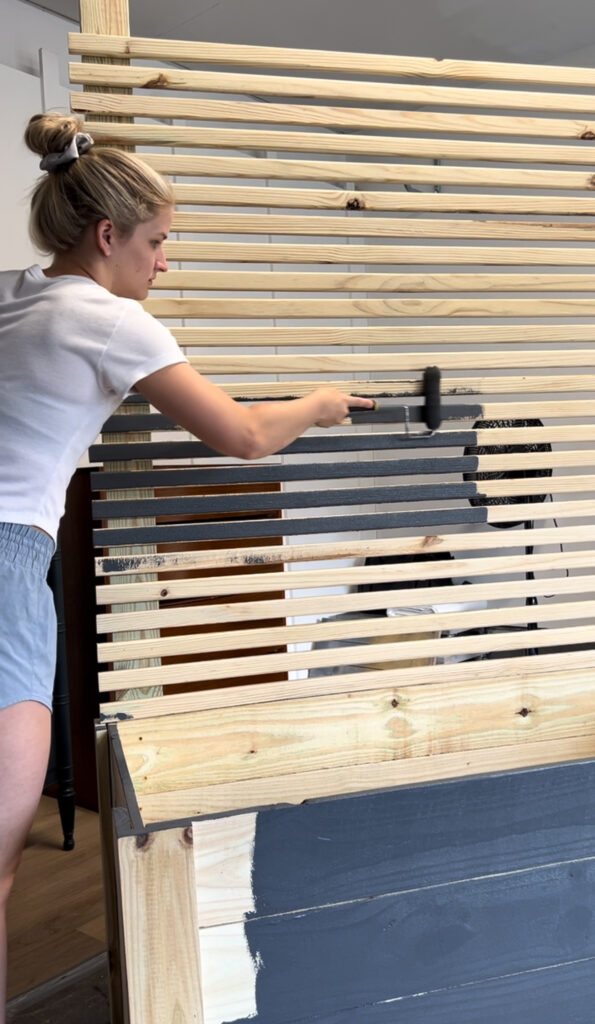
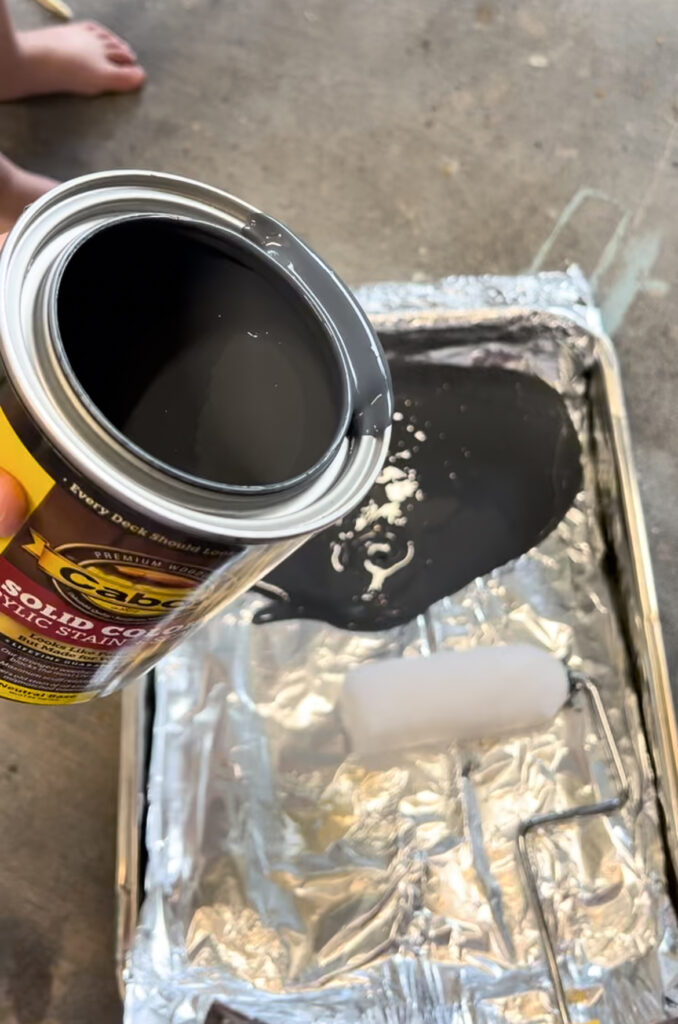
Applying the stain is straightforward. Start by ensuring your planter box is clean and free of dust. Then, using a roller or brush (I’ve linked my favorites for home projects and furniture flips) apply the stain evenly across all surfaces, following the grain of the wood. Allow the first coat to dry thoroughly before applying a second coat for deeper color and added protection.
This solid stain not only enhances the appearance of the wood, but also acts as a sealant. Which means that for years to come, it will protect it from moisture and UV damage. (Because who wants to put work into a project only for it to last one year?!) Once the stain is dry, your planter box is ready to be filled with soil and plants, bringing a touch of natural beauty to your patio.
Step 5: Add Flowers & Style Your Planter Box
While the stain dried, I ran to Lowes and grabbed a few ferns, along with plant stands to put them on. I am the furthest person from having a green thumb, so ferns were a safe choice while still providing greenery to our outdoor patio. My approach is “less is more” when it comes to adding plants and decor to ensure the planter complements the surrounding area without overwhelming it.
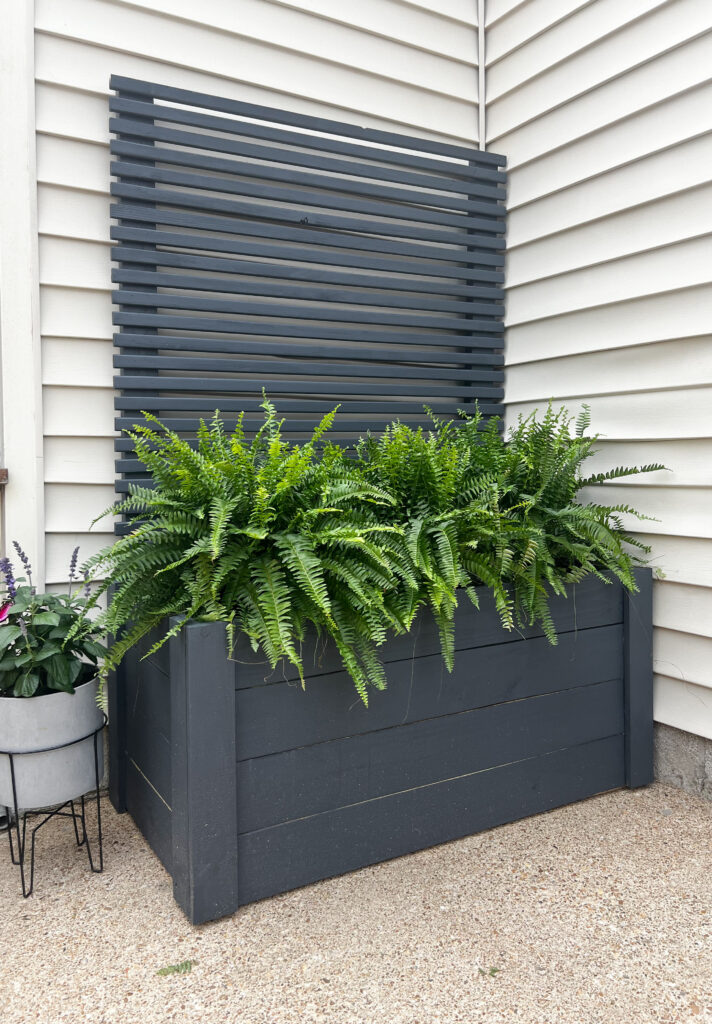
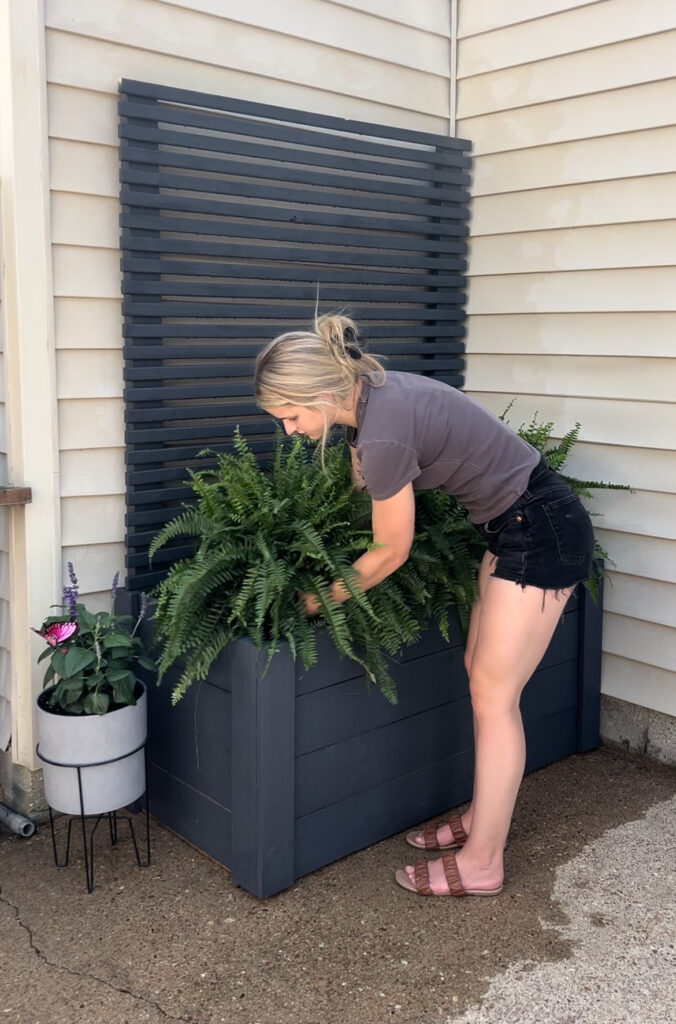

This DIY Planter Box build is now complete, and let me tell you, I’m in love with how it turned out! This patio corner went from a bare and empty space to a stylish feature. The addition of the planter box has brought new life to the patio, making it a perfect spot for relaxation and enjoyment. Planters nowadays are expensive, and I’m so happy we were able to DIY this one for so cheap!
If you’re ready to tackle a DIY planter box for your home, I’ve put together a list of all the products you’ll need to get started: Full Product List. This way you’ll have everything you need right at your fingertips.
This DIY is proof that with a little creativity, elbow grease, and a can-do attitude, you can transform any space into something special (even if your husband warps the siding). Cheers to DIY magic and the power of a fresh coat of paint! Thank you for reading along, and I can’t wait to hear what you think in the comments below!
For More DIYs, Check Out My Latest Projects!
- DIY Raised Planter Box (Just 5 Steps!)
- IKEA Flip: A Pottery Barn Inspired Makeover
- 5 Steps to Transform Your Kitchen on a Budget
- Thrift Store Find to Designer Look: A $100 Dresser Makeover
See you soon,
Sammie


