

By: Salvaged By Sammie
Hey there, DIY enthusiasts!
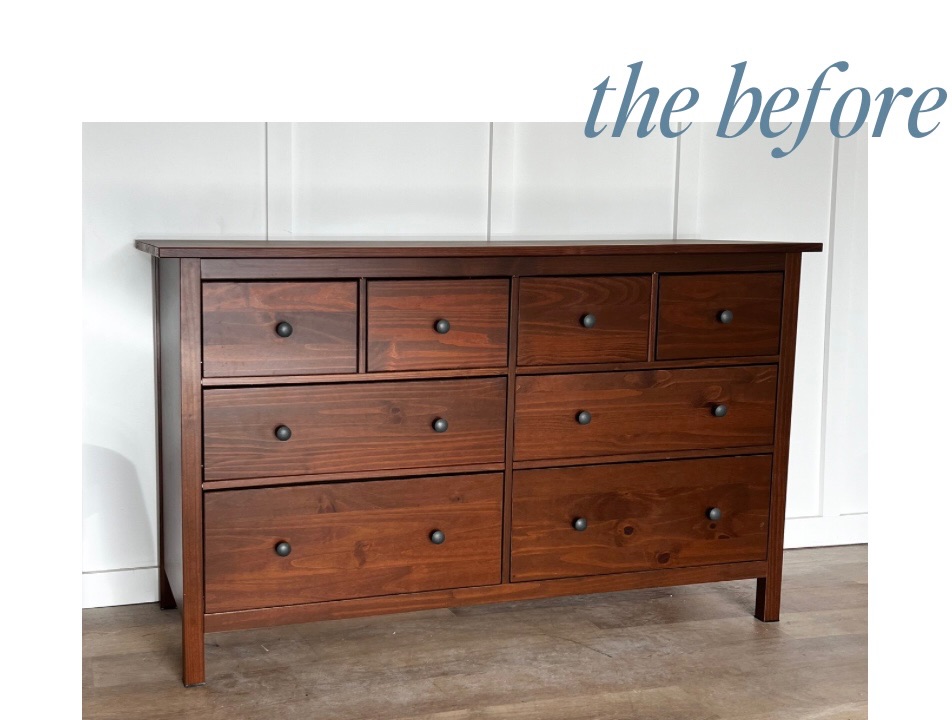
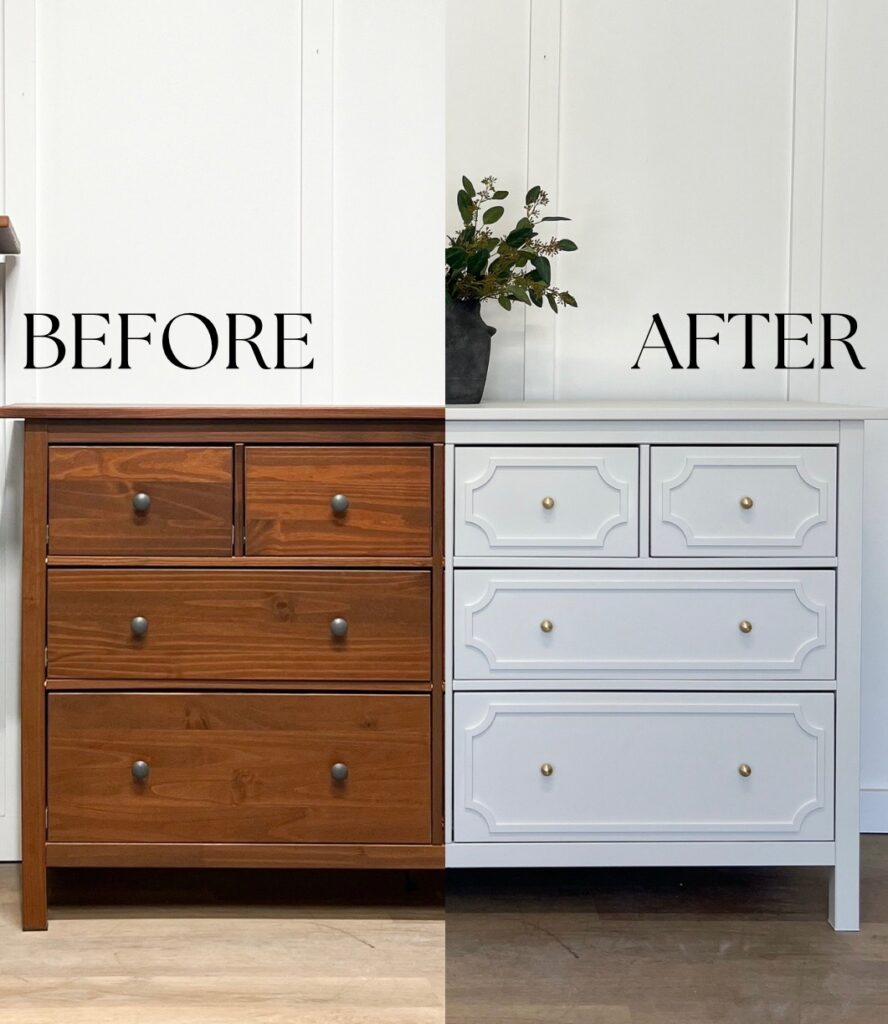
I’m so excited to share with you all my latest project – an IKEA flip that took this plain and outdated IKEA dresser from drab to fab!
Check out the 6 steps below to learn how you can create the same look!

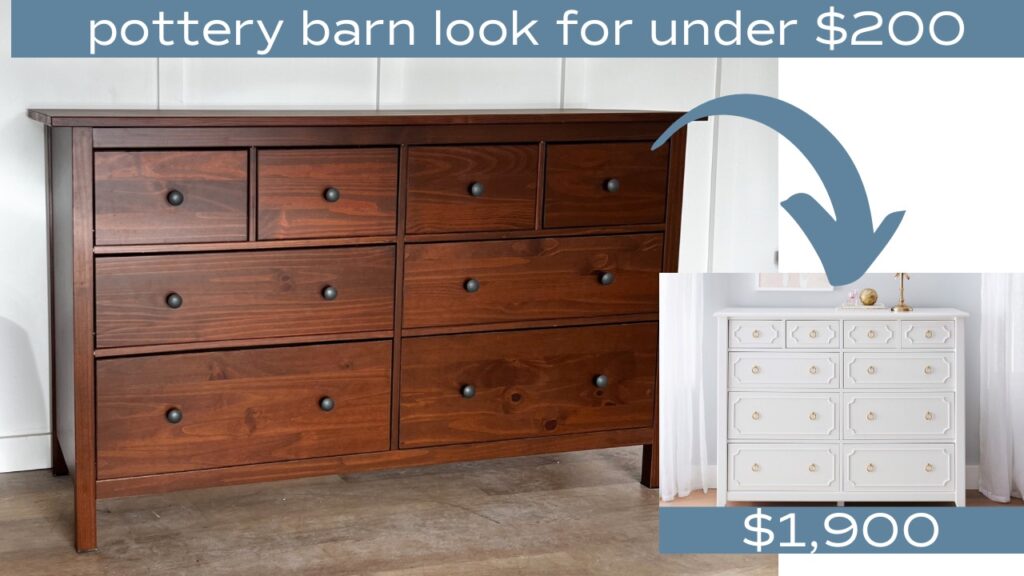
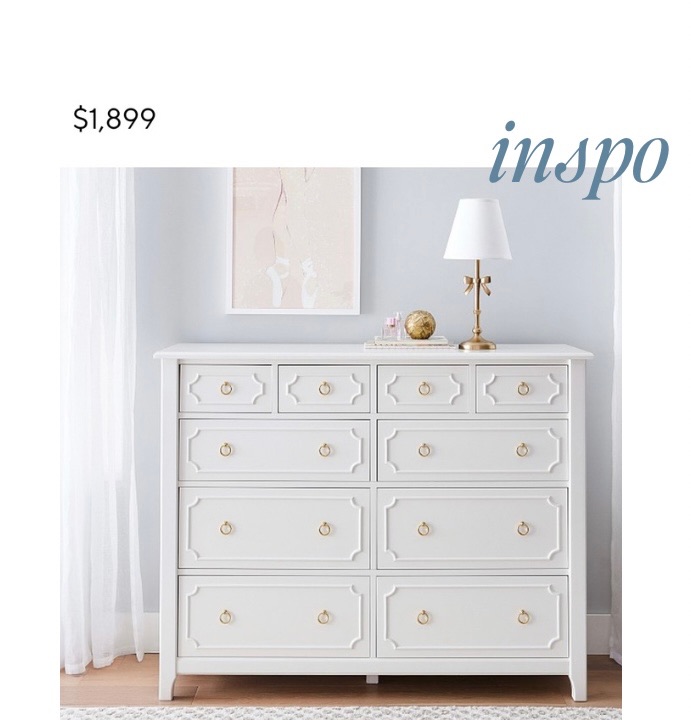
So, picture this: I’m browsing through Pottery Barn’s website (as one does), and I stumble upon this gorgeous white dresser. I’m talking sleek lines, elegant design, and a price tag that nearly made me faint – $1,899! But fear not, my friends, because where there’s a will, there’s a way. And we’re about to recreate this look using an IKEA dresser.
For an IKEA Flip like this, you’ll need the following items:
This post contains affiliate links. See policies for details.
- Full Product List – exact products I used!
- Cleaner / Degreaser – any degreaser, but here’s my favorite!
- Sander & Sandpaper – any brand will work just fine, but I’ve linked a budget-friendly option!
- Wood Filler
- Primer or Shellac
- Paint – Fusion Mineral Paint is my go-to
- Topcoat
- New Knobs – optional, but a fun detail to change up
- Cabinet Face Design – optional, but this really elevated the piece
Step 1: Cleaning your Furniture Flip
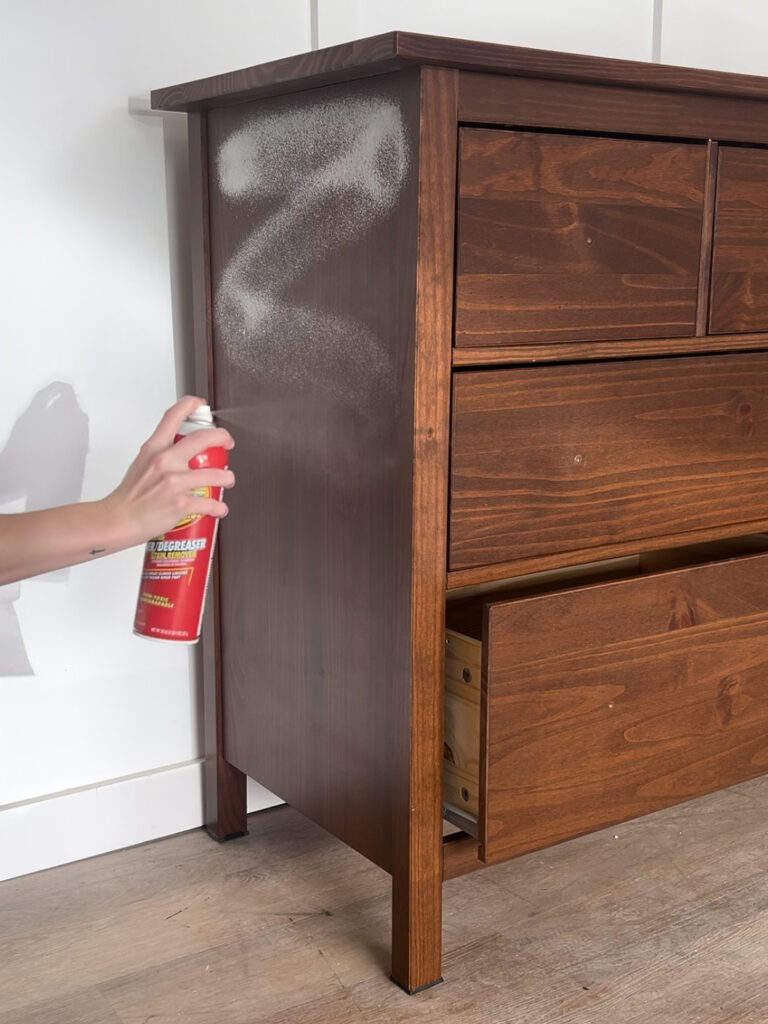
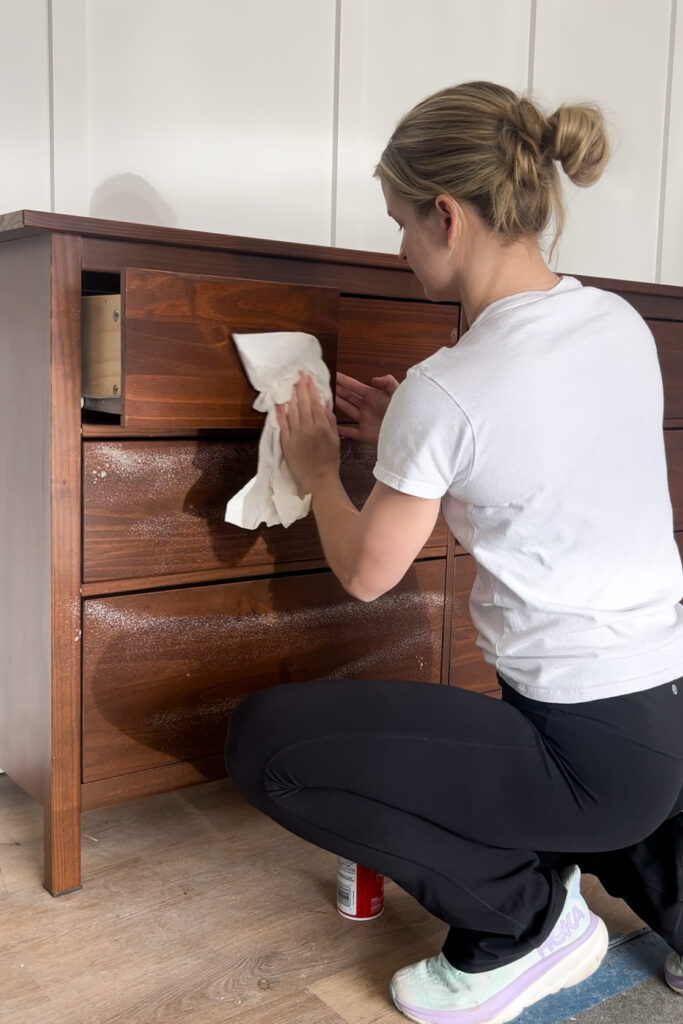
This is the gunky and gross part of furniture flipping, but it’s an essential step that can’t be skipped! I use Krud Kutter, but any degreaser will do the trick. You never know how long a piece has been sitting in storage and it’s always a great idea to clean it right away.
Paint will not adhere well to oils, and cleaning before sanding will help to prevent the “yuck” from building upon your sandpaper (less direct contact with the finish means you’ll go through sandpaper quicker, and we’re all about money-saving around here!)
Step 2: Sanding the Finish
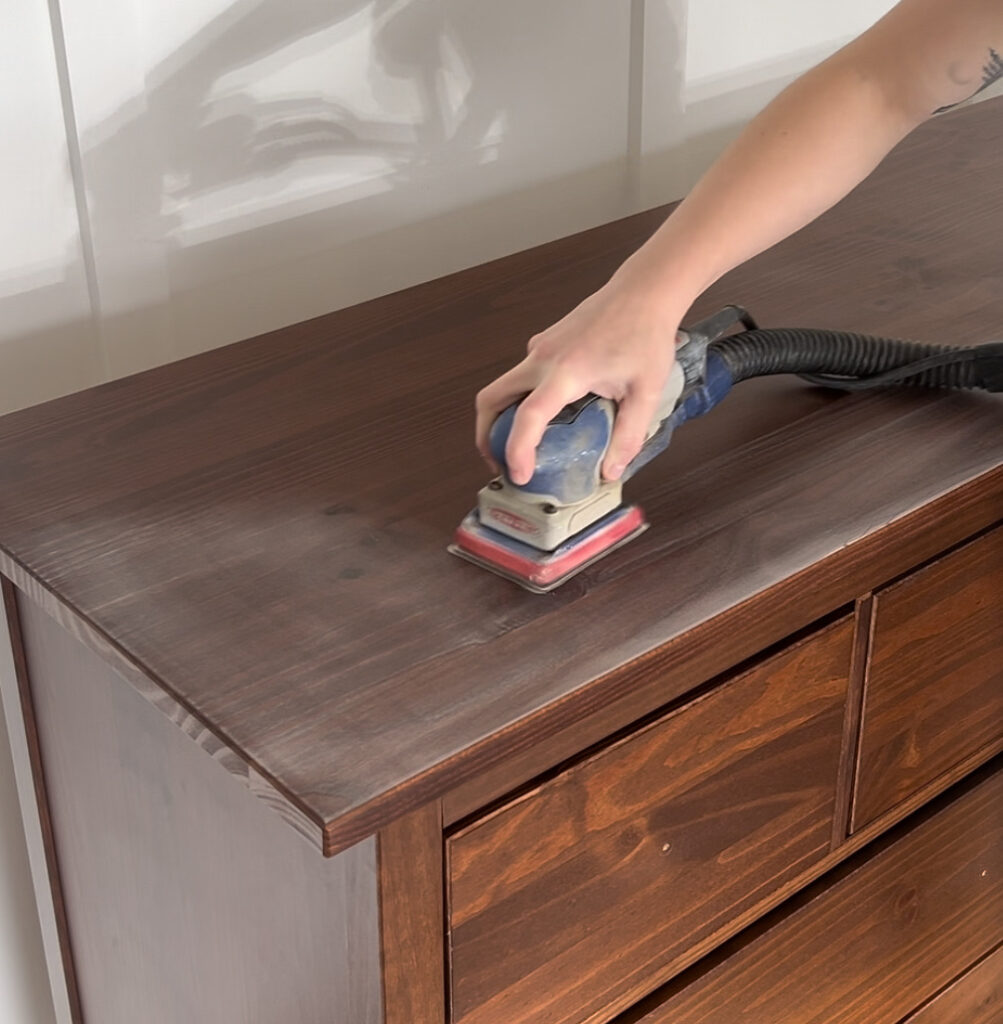
The next step in our IKEA Flip is to “Scuff Sand” or lightly sanding your piece of furniture. Doing this prior to priming will help with adhesion and give your paint some “teeth” to grip onto. I usually use 150 or 180 grit sandpaper for this.
It will also remove any surface level nicks and dents so we can achieve that buttery smooth finish!
Step 3: Patching Damage
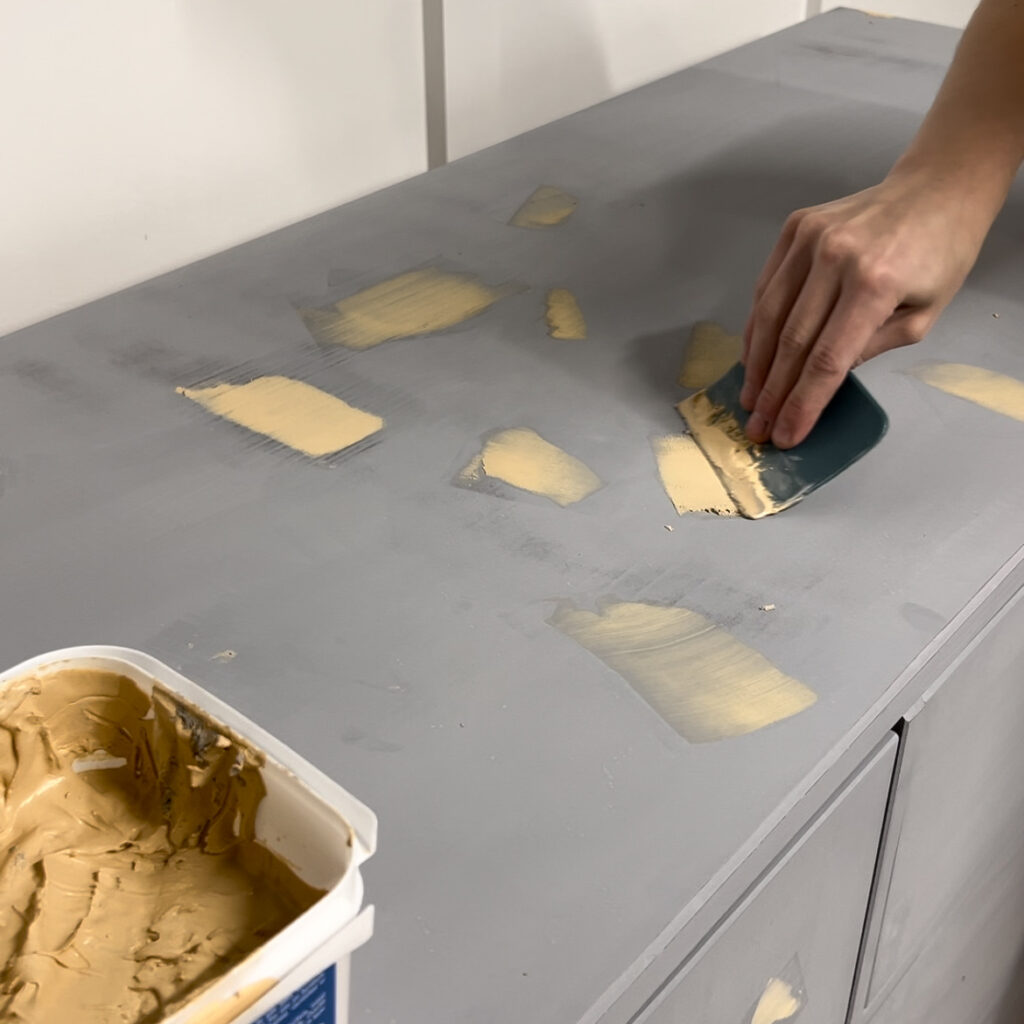
Since furniture we flip is usually previously loved, it may have some damage! I use my wood filler to fill any leftover dents that didn’t get sanded out, and then lightly sand off the wood filler with 220 grit sandpaper.
Step 4: Priming your Dresser
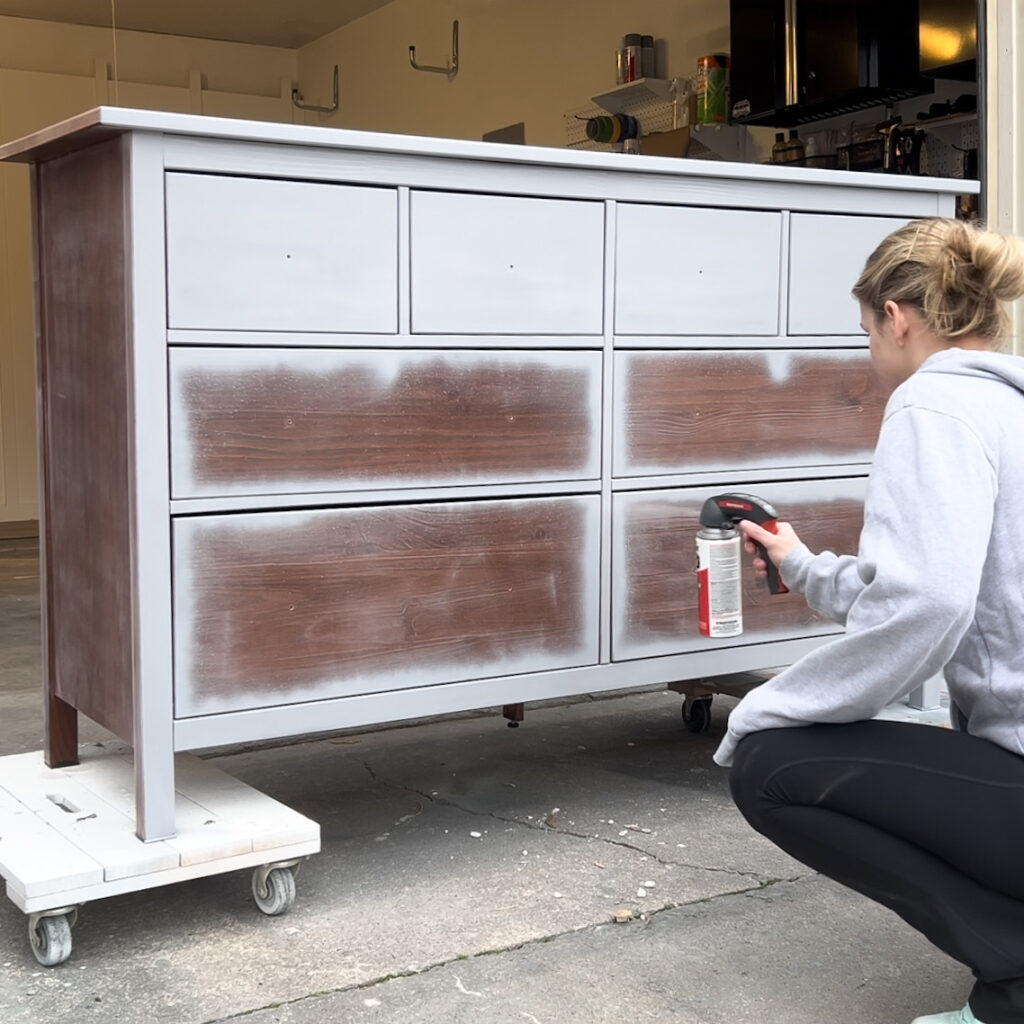
We’re now onto the first painting step of this Ikea makeover, Priming! Priming has many benefits such as helping with adhesion for the paint, stain and odor blocking, and helping to give the paint a perfect coat to lay on top of.
For this flip, I used my go-to spray primer which is linked here.
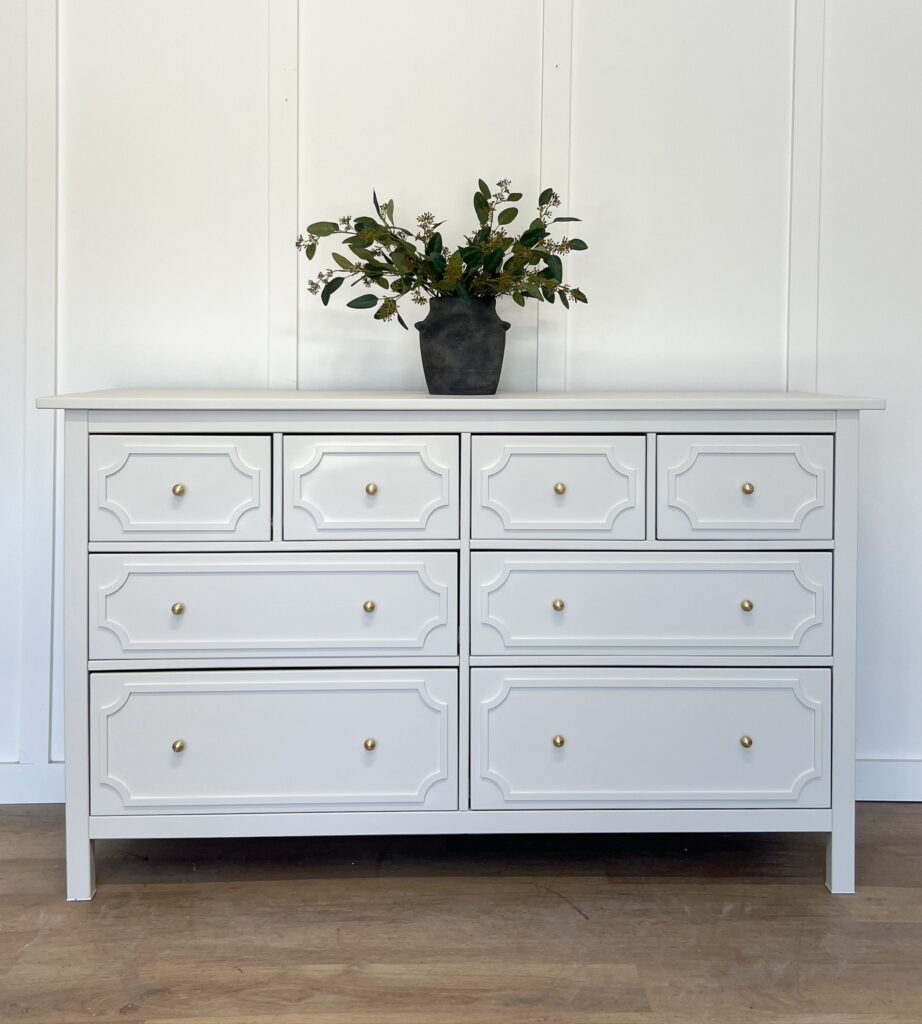
Step 5: Adding Drawer Front Details
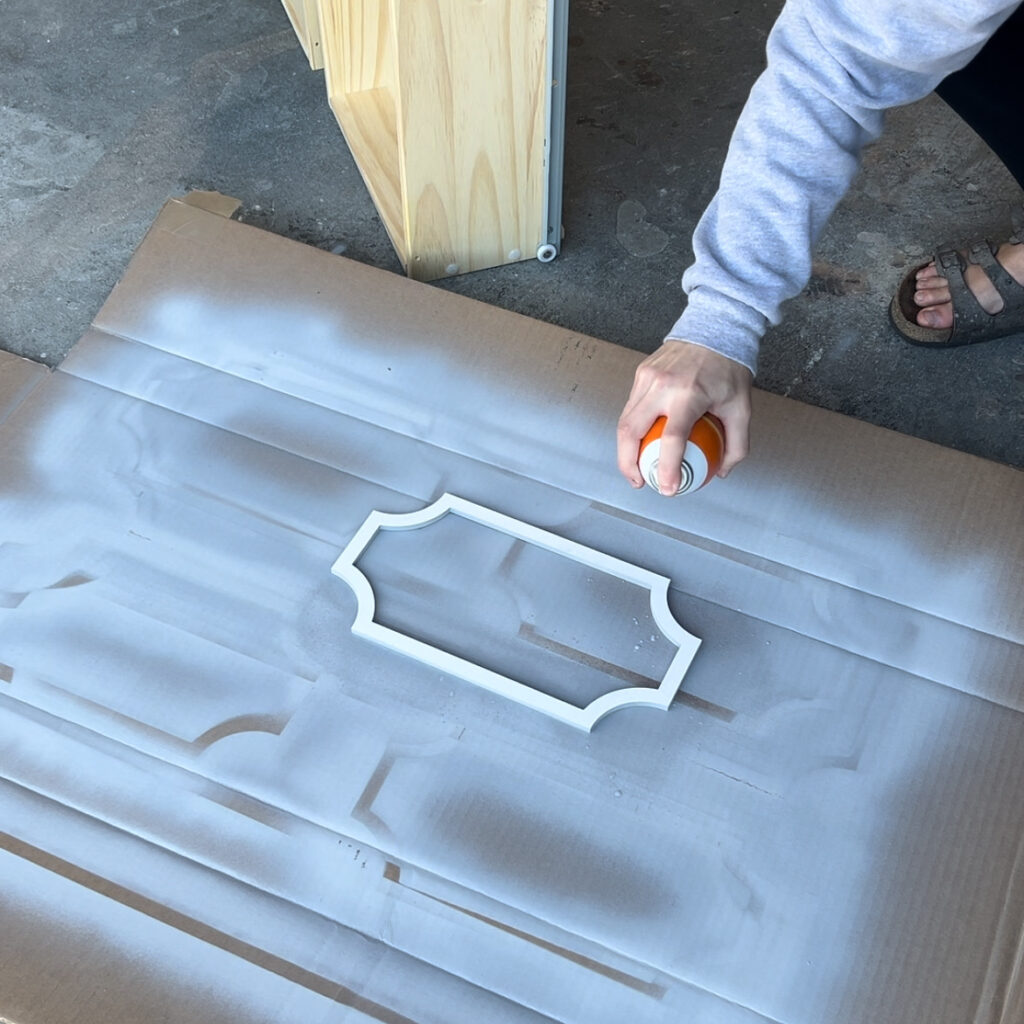

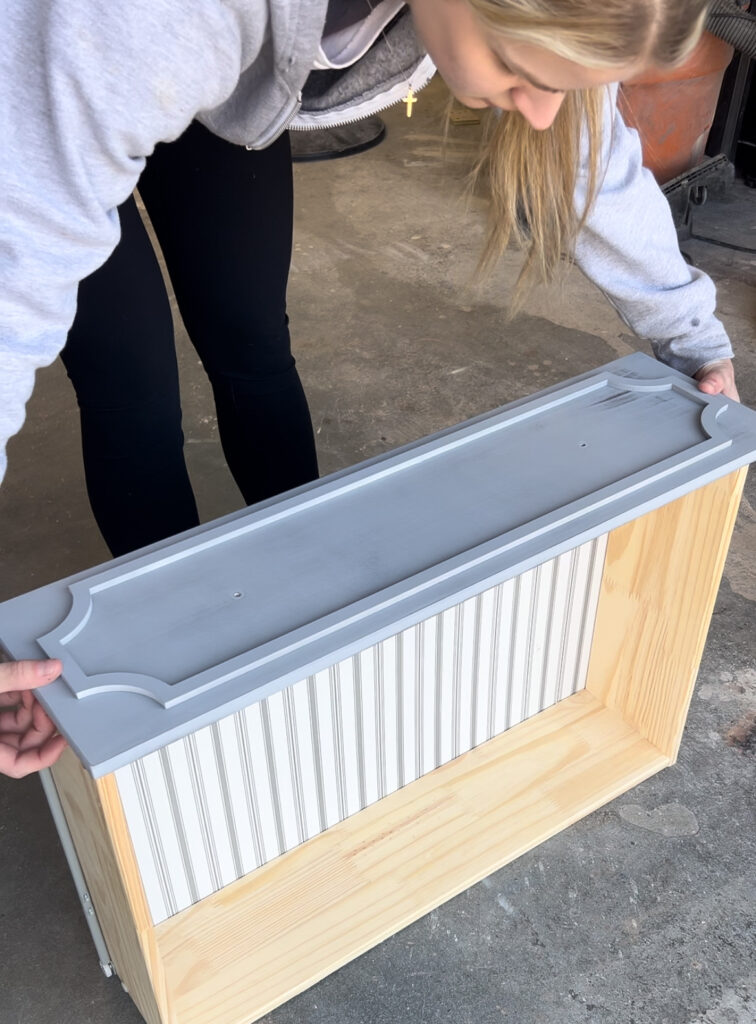
Here is where this IKEA dresser went to the next level. The Pottery Barn dresser we are trying to recreate had beautiful drawer front designs. I found these drawer front details from a company called O’verylays, who make drawer emblems specifically for IKEA flips!
I primed them, and then attached them to the fronts using a spray adhesive.
Step 5: Painting & Top Coating your Ikea Flip
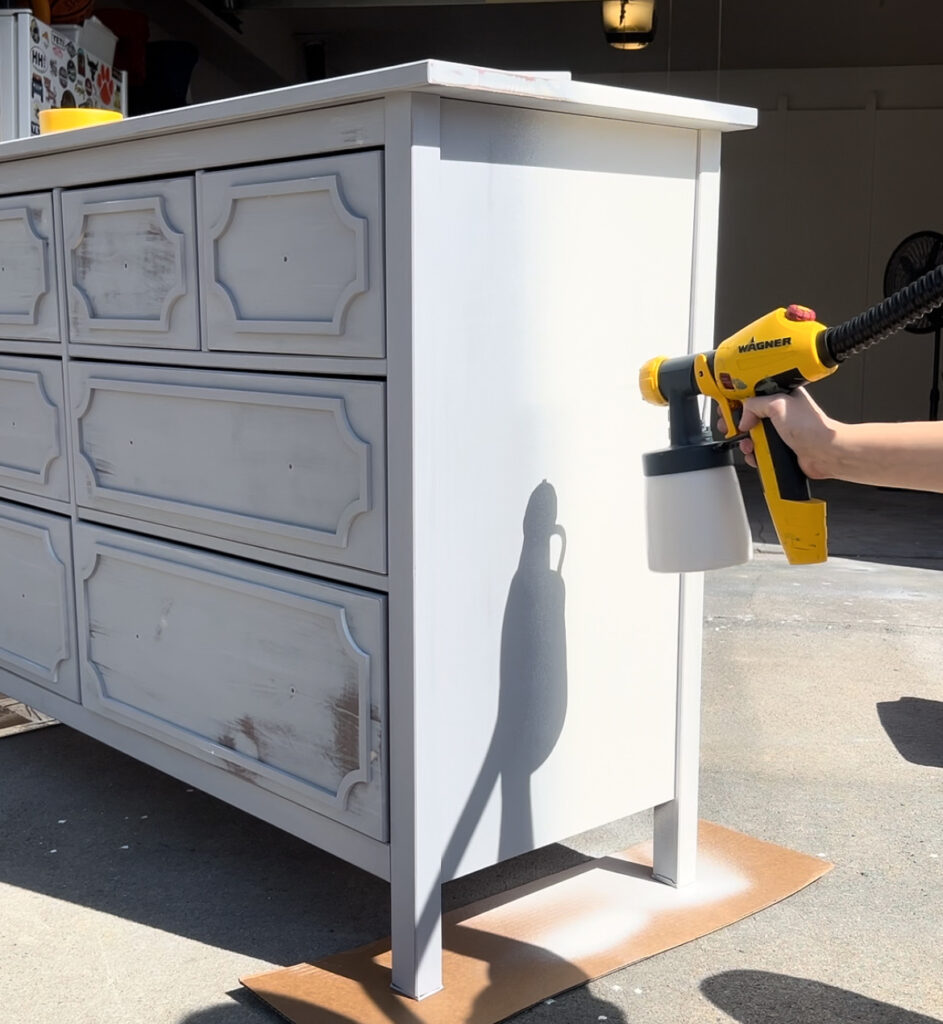
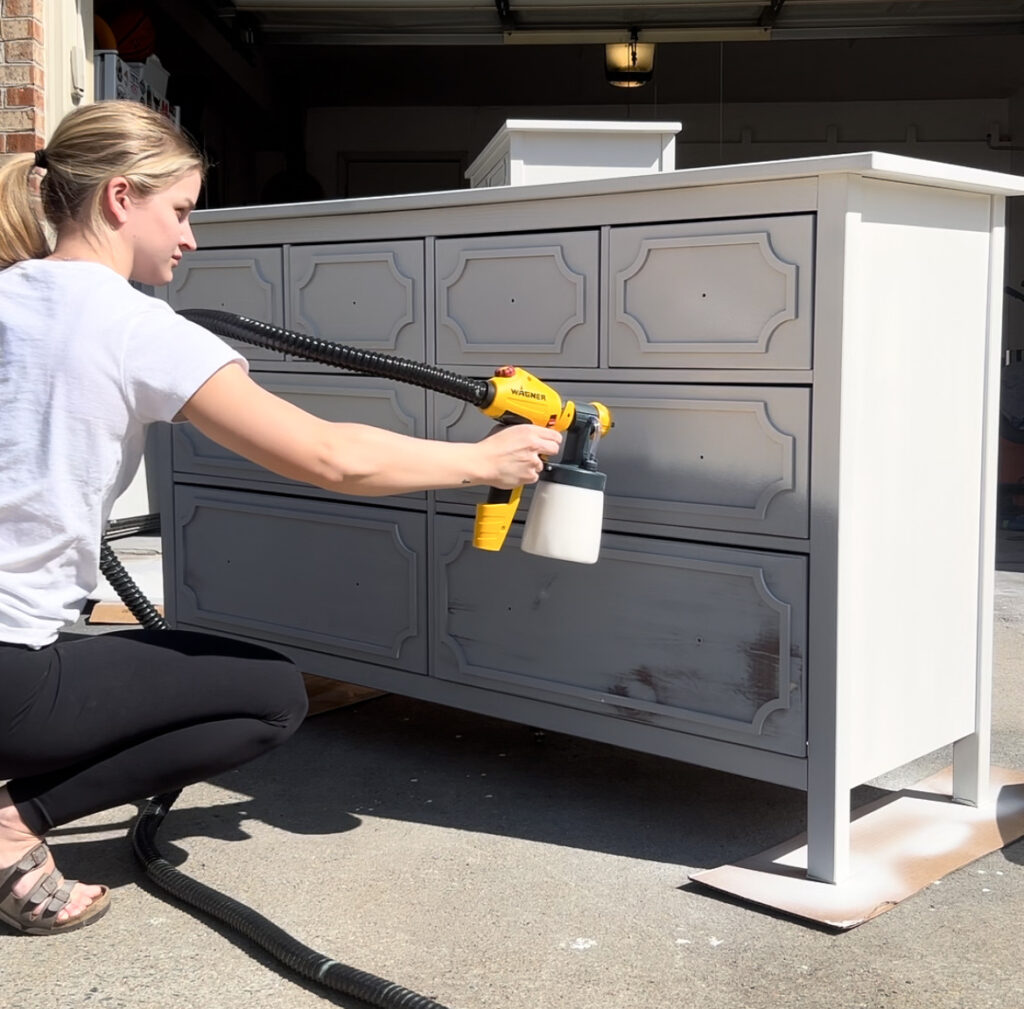
Here comes the fun part: Choosing a paint color! Since I’m recreating a dresser I found, I’ll be using an off-white like the inspiration piece. But this is your time to get creative and create pieces that blend with your home.
For furniture flips, I typically use Fusion Mineral Paint. It has great adhesion, is water-based for easy cleanup, and you can order it right from Amazon (because who doesn’t love convenience?) But for this dresser, I used “Balboa Mist” by Benjamin Moore, which was left over from our kitchen cabinets during our Budget-Friendly Kitchen Makeover.
When it comes to topcoats, Varathane water-based polyurethane is my favorite. It holds up great and since it’s water-based, it won’t cause lighter colors to yellow over time.
You can apply both of these with a paint brush, rollers, or a paint sprayer. I’ve linked my favorite beginner-friendly sprayers here.
Step 6: Adding New Hardware

You can keep the old hardware or buy new! I like to get hardware that is a little more modern, and I’ve linked some of my favorite handles and knobs for furniture flips here.
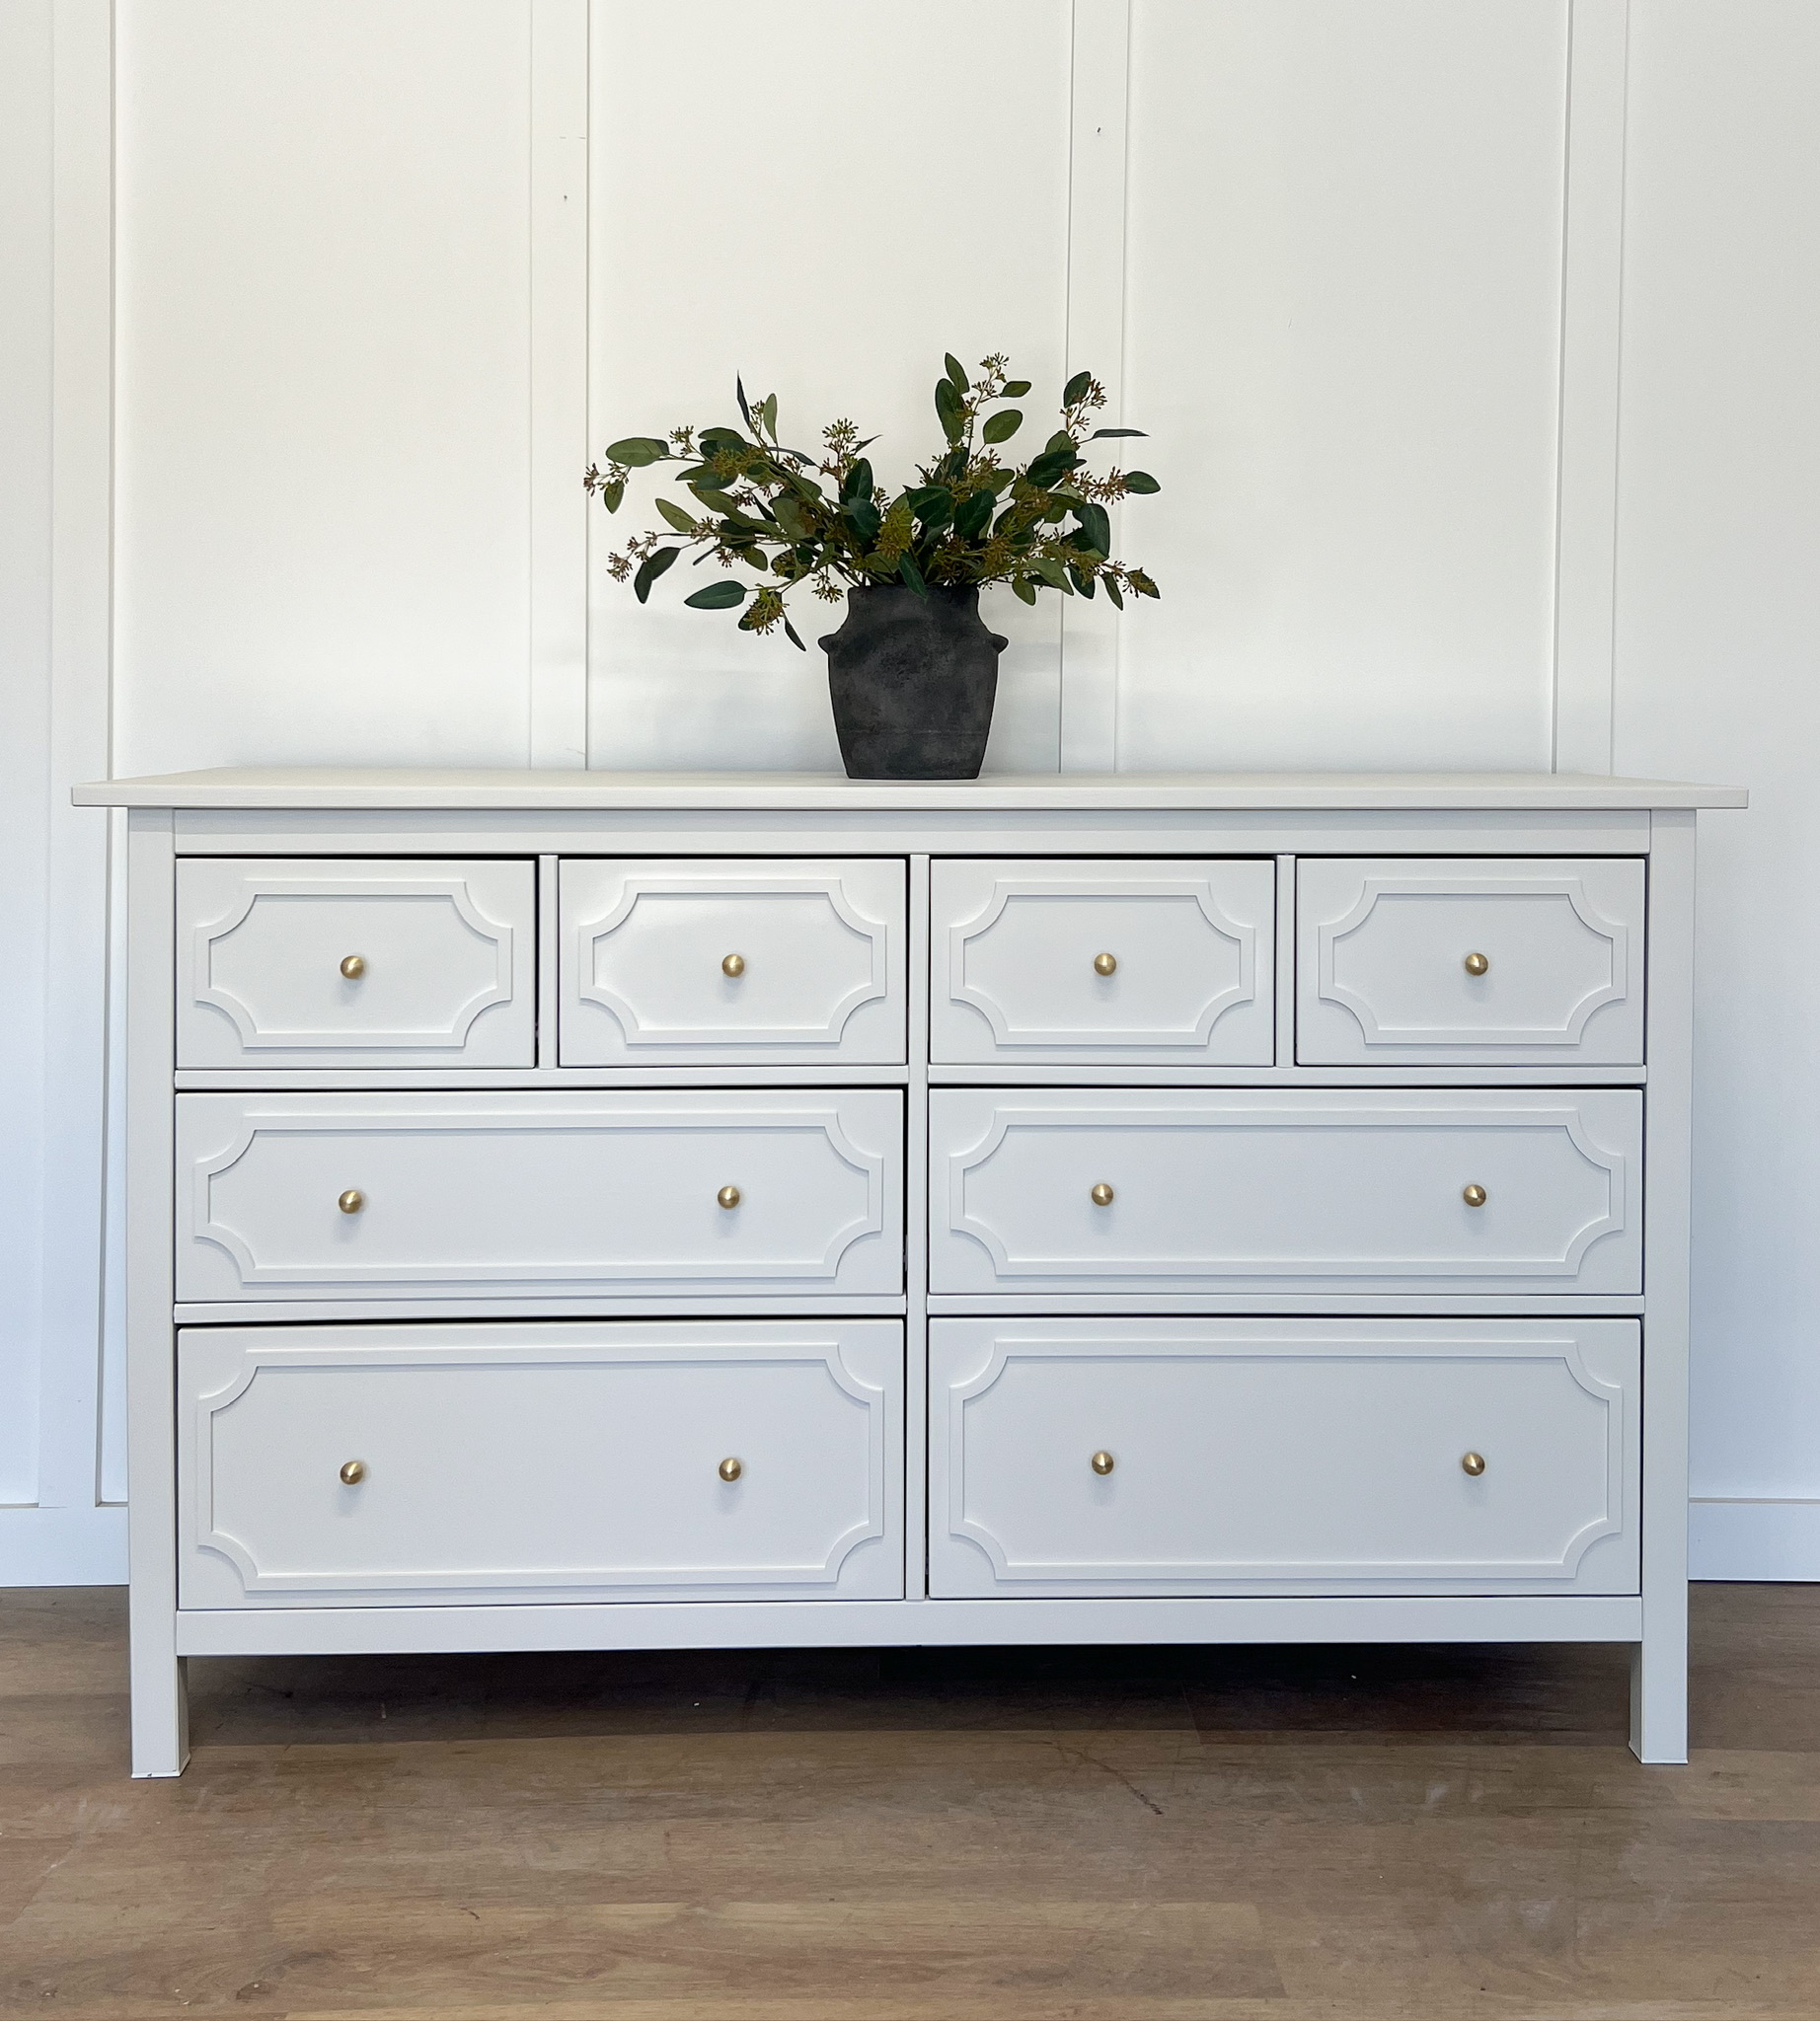
Well… Are you ready to see what all our work brought us to?!

From sanding and painting to polishing and adding those little designer details, I poured my heart and soul into this IKEA Flip. You can check out the full video here!
Let me tell you, the end result was nothing short of amazing (even I didn’t think it would turn out this well! Especially for just $200 total? You can’t beat that. It was like I had my very own designer piece – but without the hefty price tag.
Now, here’s the best part: YOU CAN DO THIS TOO! I’ve put together a list of all the products you’ll need to get started: Furniture Flipping Starter Kit. And you can find my FREE Furniture Flipping Mini Guide, here.
So, if you’re feeling inspired to tackle a similar project yourself, you’ll have everything you need right at your fingertips. Who knew that thrift store finds could turn into such gems? Can’t wait to hear what you think in the comments below!
See you soon,
Sammie


